
Booking widget
Take bookings on your own website.
Add the TourDash booking widget to your site, or share your booking link. Travelers choose a tour, date and time, and the booking appears in Tours next to all the others.
Free and tip-based tours need no payment account.
How it works
From your website to your Tours board
A traveler clicks Book now
The widget opens over your page or inside it. There’s no app to install and no account to create.
They pick a date, time and group
The calendar highlights days with departures from your schedule. They choose a time, a language and how many people are coming.
The booking lands in Tours
It shows on the departure, marked with your logo. The traveler gets a confirmation email with a link to manage it.
Display modes
Three ways to fit your website
Choose how the widget opens, copy the code and paste it into your page. Switch modes any time by copying a new code.
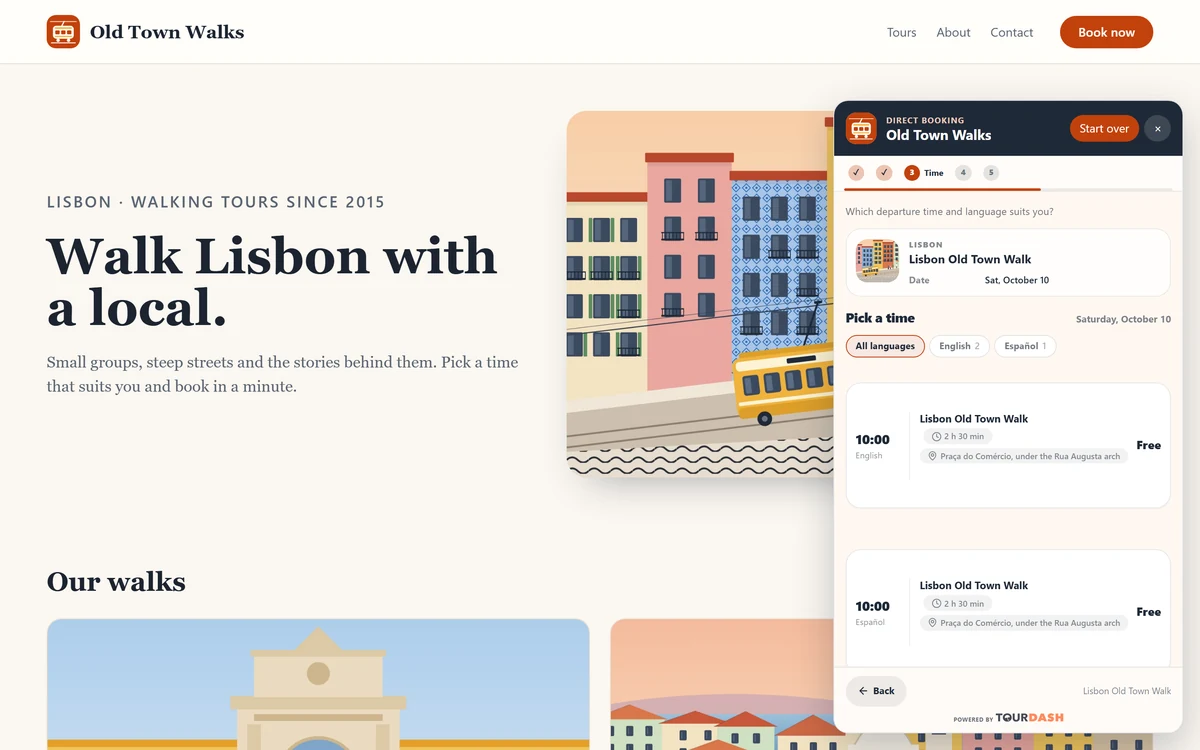
Assistant
A floating window in the corner, opened by a booking button.
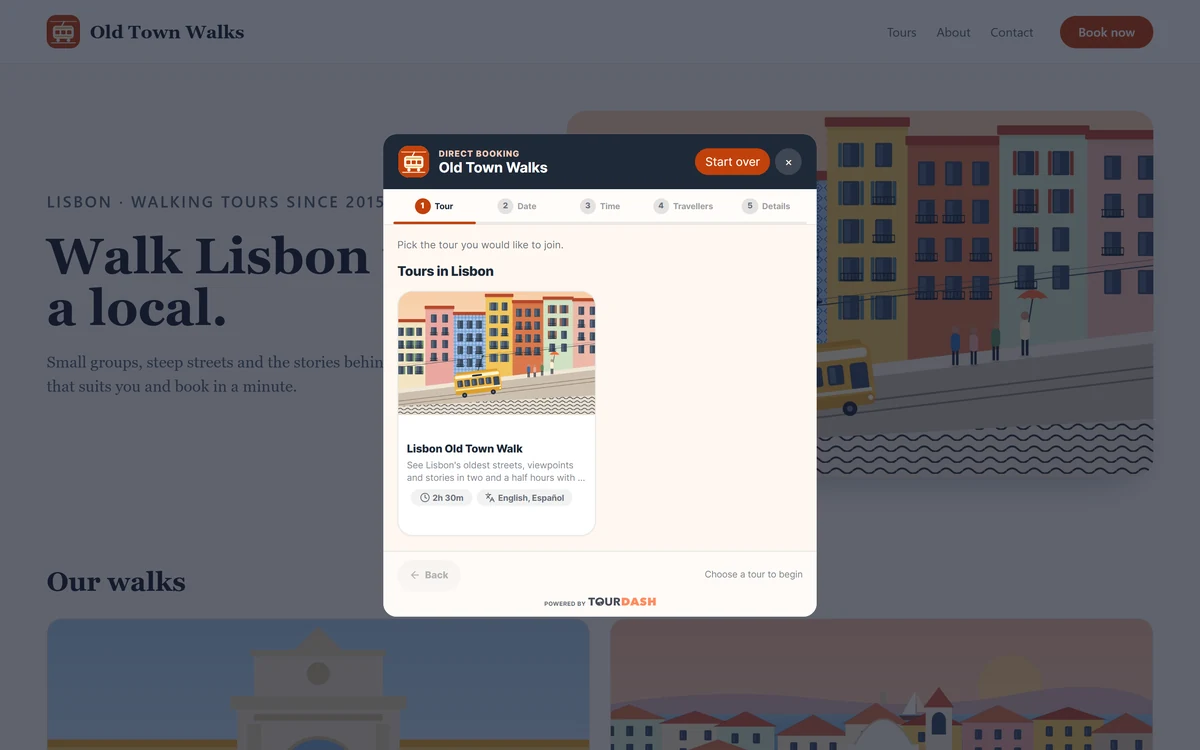
Popup
A centered overlay that opens from your own Book now button.
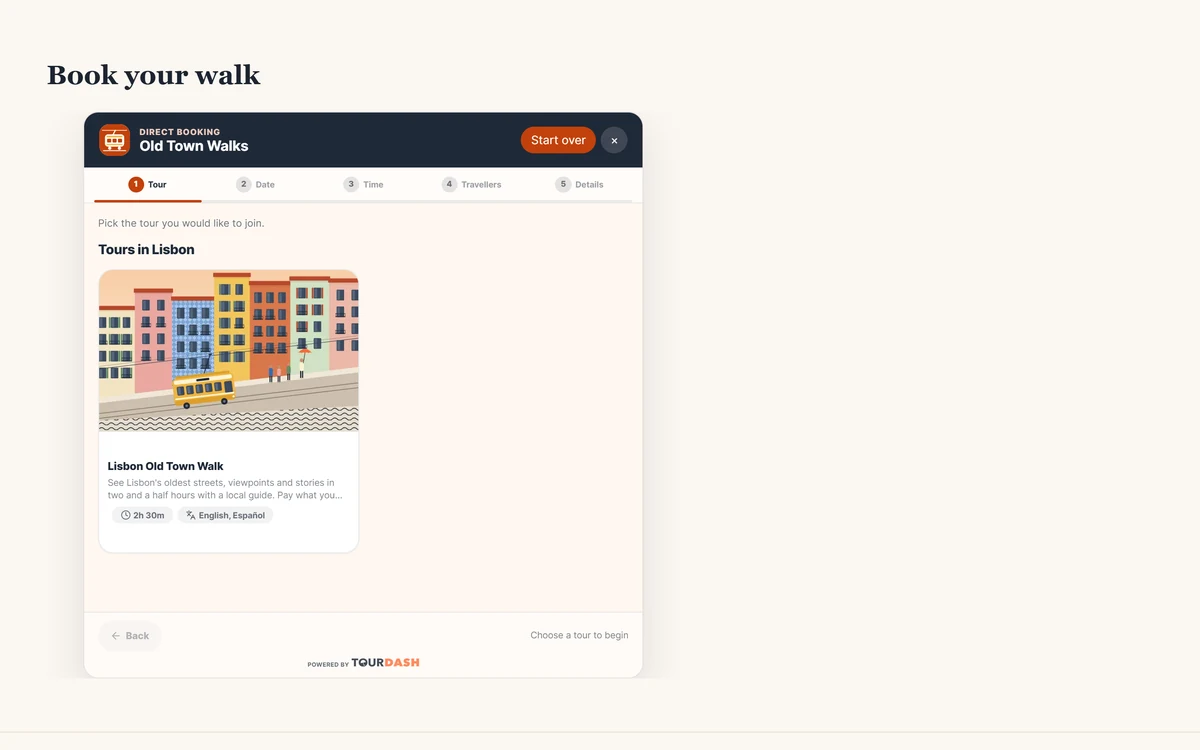
Inline
Built into your page, right where you paste the code.
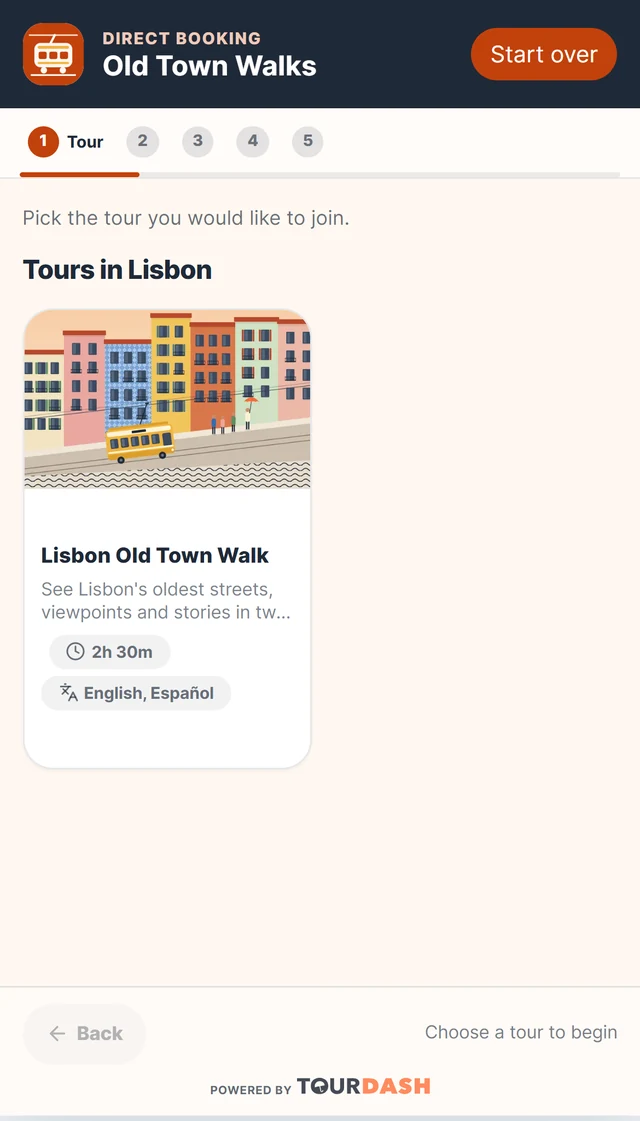
Real screenshots on a sample website. Set your colours, logo, corners and type style once in Widget settings. They apply to your website, your booking link and the preview.
Booking flow
Five short steps, made for phones
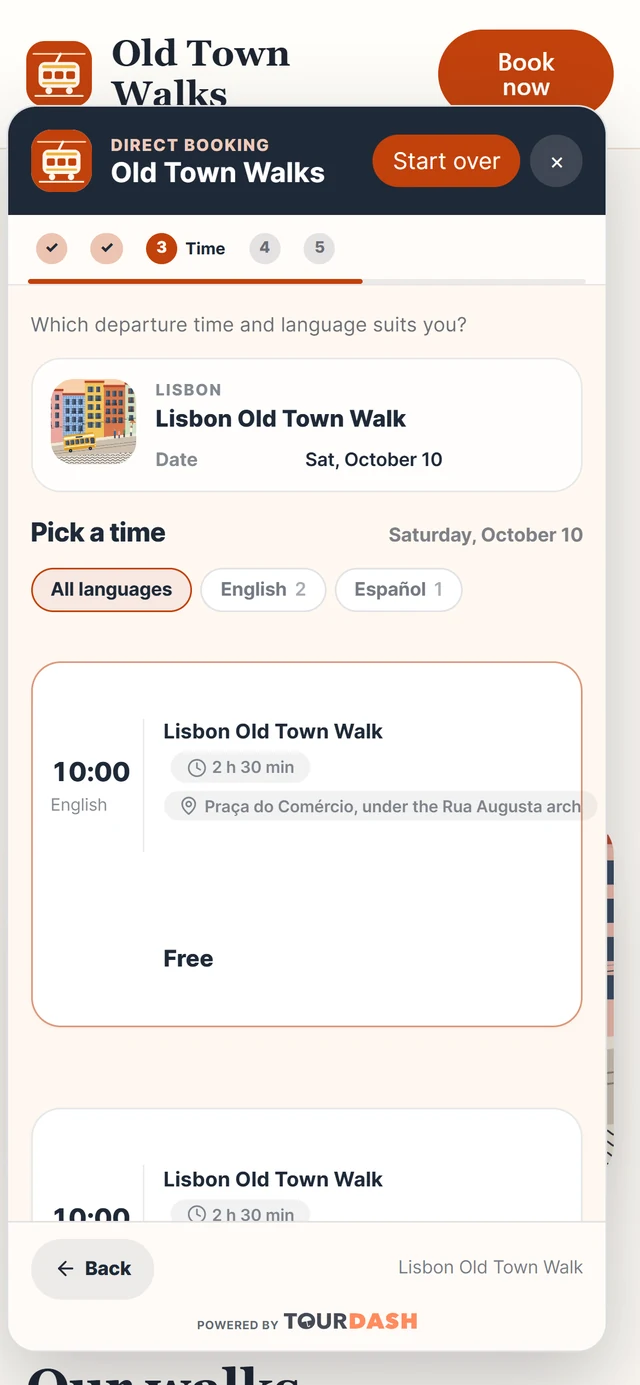
Tour, date, time, travelers, details. Your photos and practical information sit under About this tour, so travelers never leave the booking.
- A city step comes first when you sell tours in more than one city.
- Times can be filtered by tour language, with a count for each.
- Travelers give a name and email. A phone number is optional.
- Free tours confirm straight away. Paid tours continue to secure checkout.
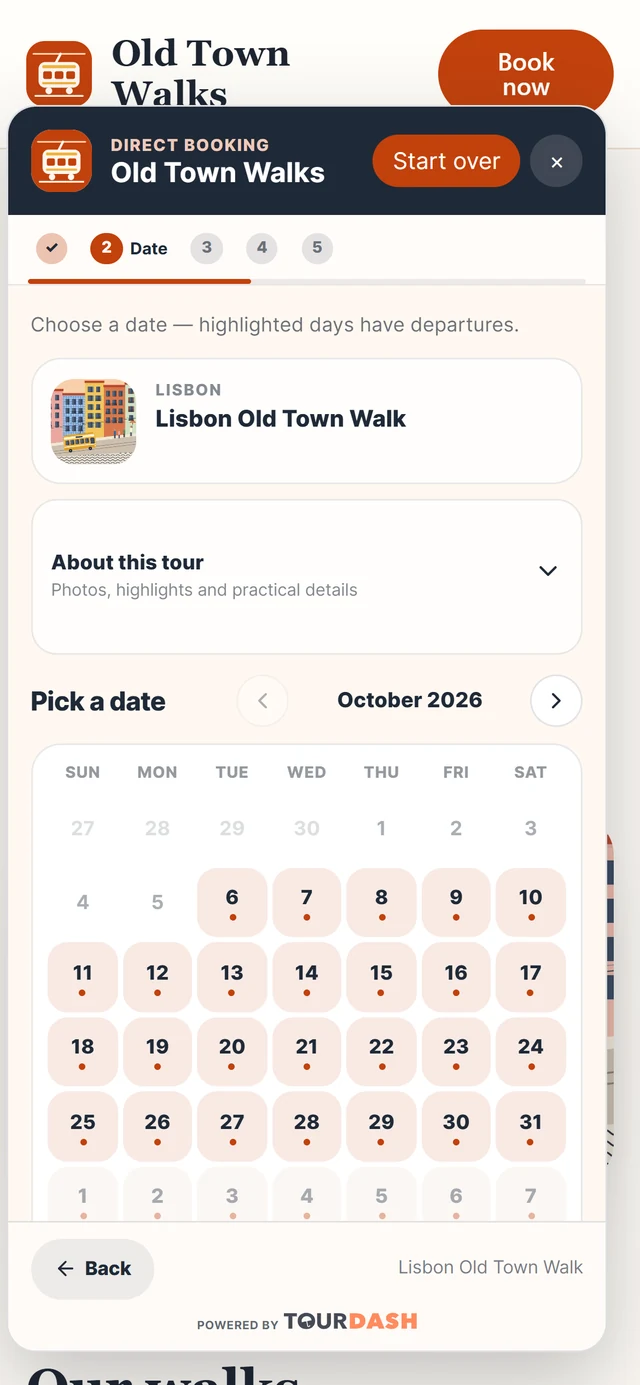
Languages
Speaks your travelers’ language
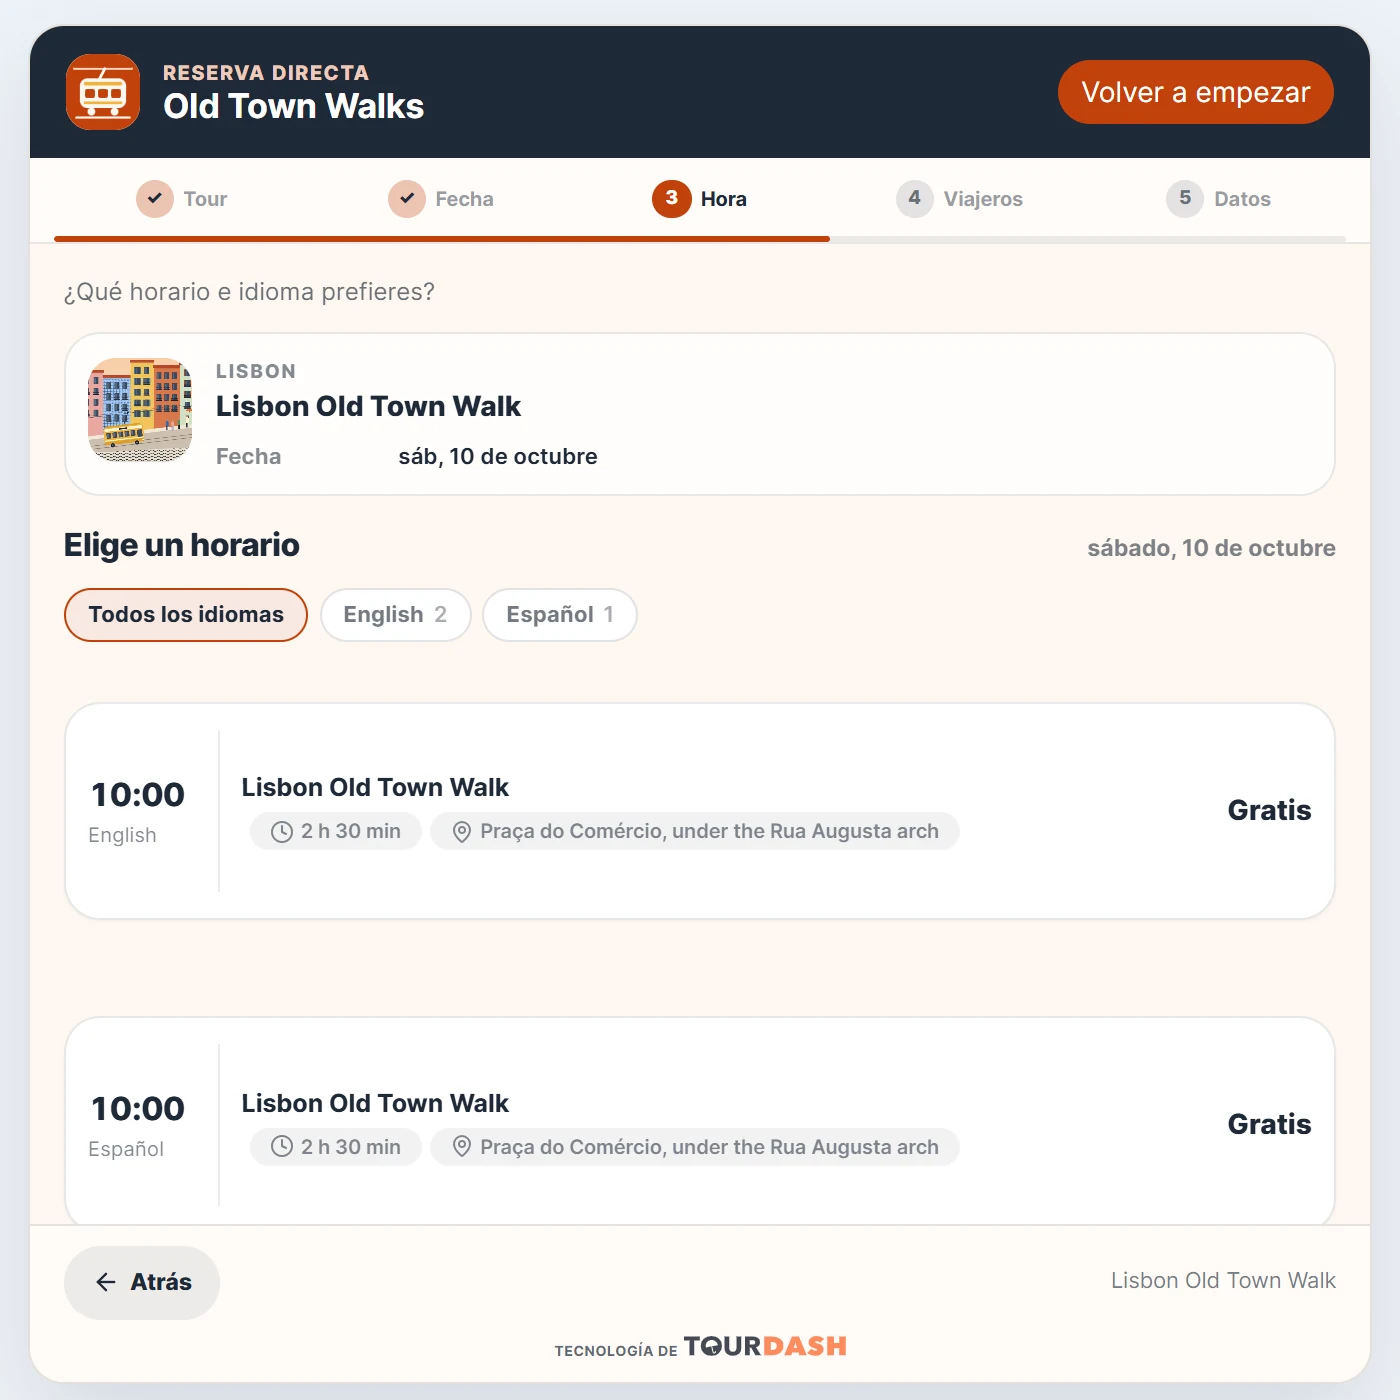
The widget follows your website’s language: English, Spanish, French, Italian, German, Portuguese, Dutch or Polish. Your tour texts show as you wrote them, or in a translation you’ve saved.
- Offer only some departure languages on a page, such as Spanish tours on your Spanish site.
- Send travelers to your own thank-you page in each language.
In TourDash
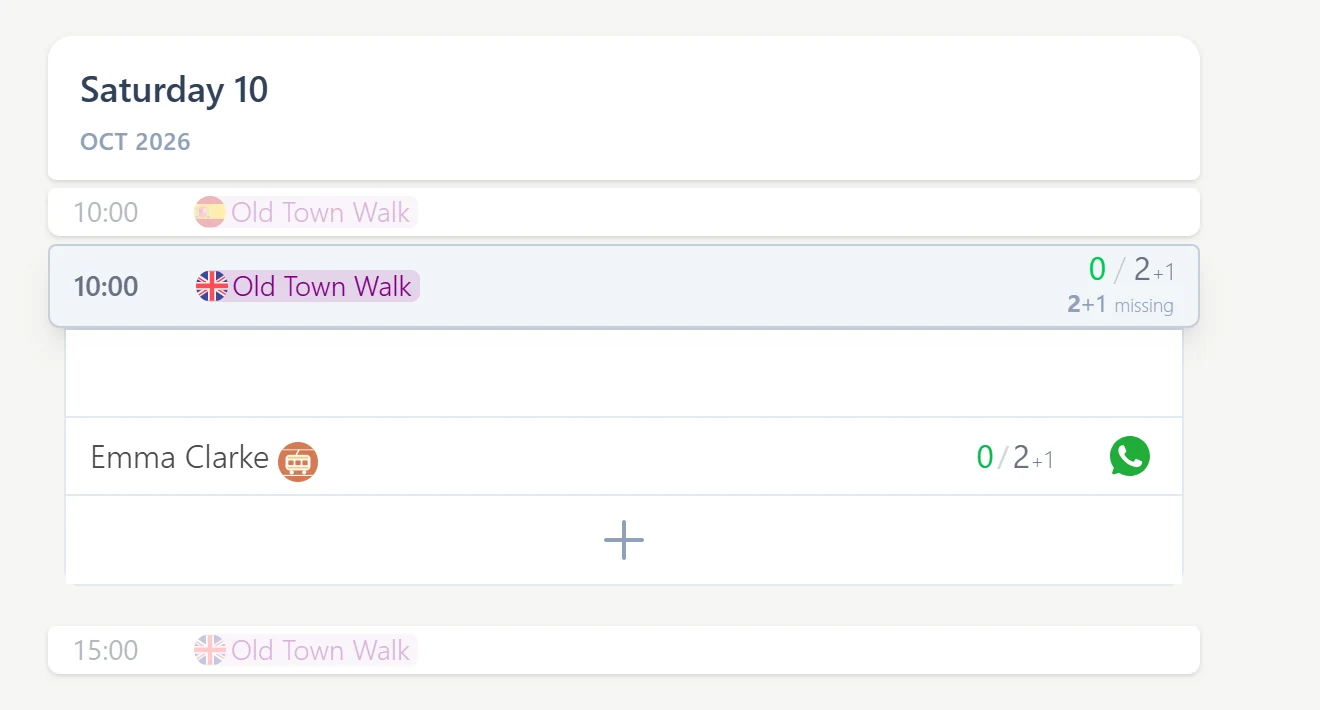
Website bookings land in Tours
No copying between systems. A website booking appears on its departure in Tours with the traveler’s name, contact details and tickets, ready for your guides.
- Your company logo marks website bookings.
- Each new booking is emailed to your booking notification address.
- Travelers get a confirmation email with your meeting point and instructions.
Self-service
Travelers manage their own booking
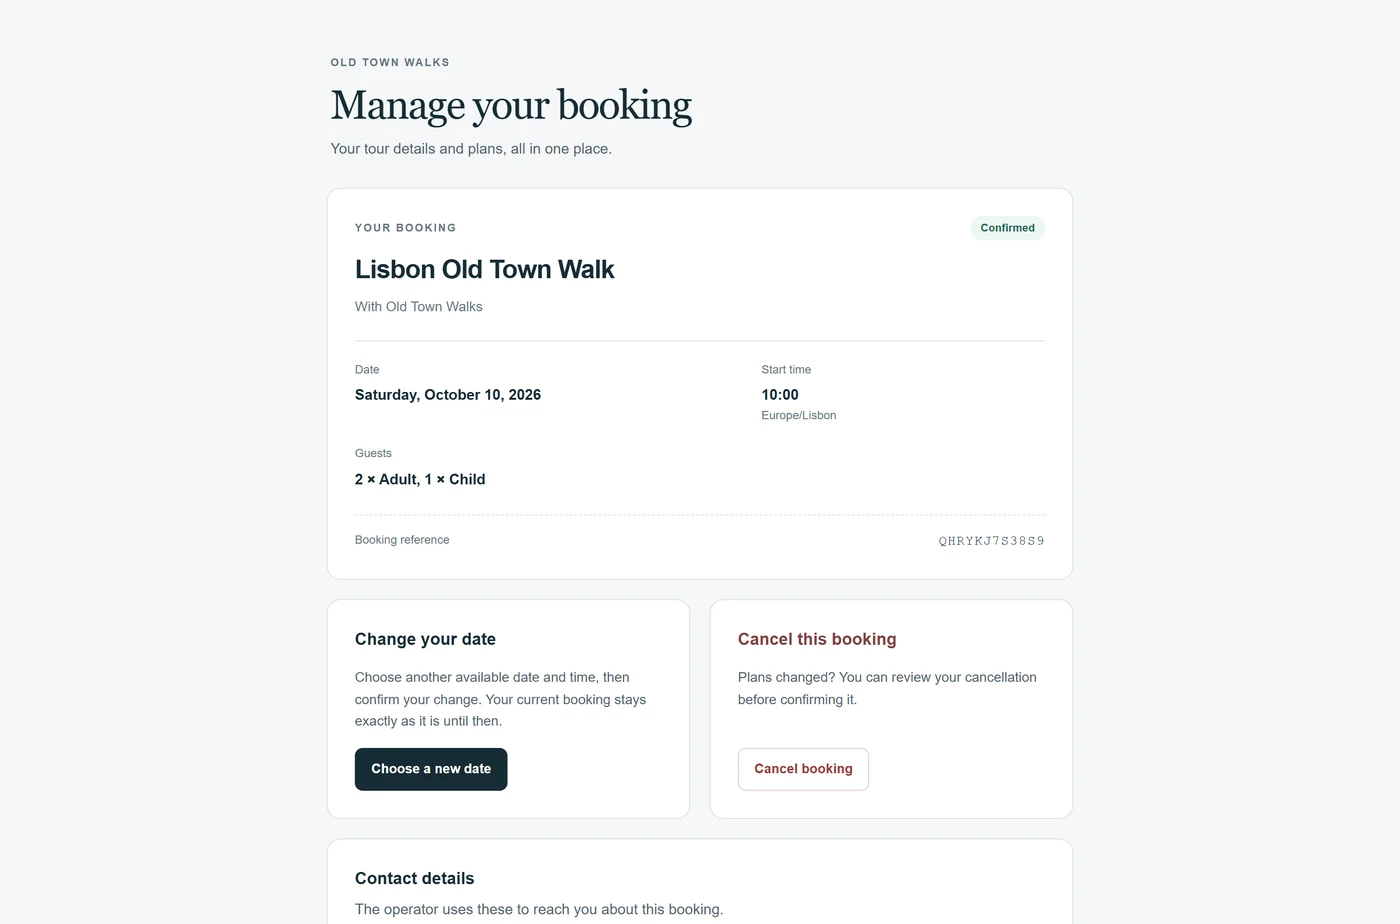
Every confirmation email links to a page where travelers can choose another date, cancel or update their contact details. Their booking stays as it is until they confirm a change.
- Cancellations follow the terms you set for each tour.
- Saved changes to a tour apply to future bookings. Existing bookings keep their terms.
Payments
Free walks or paid tickets, your call
Run free and tip-based tours with no payment account at all. For paid tours, travelers pay by card in secure checkout, and the money goes to your own Stripe account.
- You’re the merchant of record. Card details never reach TourDash.
- Connect the Stripe account you already use, or create one during setup.
- Paid checkout opens once TourDash approves your payments. Free tours can take bookings meanwhile.
Booking link
No website? Share your booking link
Every company gets a secure booking page with the same steps. Put it in your social profiles, send it in messages or print it as a QR code.
- It works as soon as you turn on online booking.
- Use it next to the widget, for anywhere you can’t add code.
Setup
What you need to get started
Requirements
- Owner access in TourDash
- A tour with departure times, ticket types, a description, a photo and cancellation terms
- An email address for booking alerts and travelers’ replies
- For paid tours: a Stripe account, or a few minutes to create one
- For the website embed: your website’s address, so TourDash can allow it
Six steps
- Create the tour and its booking option in Tour Setup.
- Add departure times with seasons and weekly times.
- Write the listing: description, photos, meeting point and terms.
- Turn on online booking in Widget settings.
- Share your link and paste the code into your website.
- Make a test booking and find it in Tours.
Embedding on your website needs a one-time approval of its address.
Costs
What a booking costs you
Free and tip-based tours
No payment fees
Travelers don’t pay online, so there’s nothing to charge.
Paid tours
Stripe’s fees
Stripe’s processing fees come out of your Stripe account, as with any Stripe payment.
TourDash application fee
€0 by default
Zero unless you’ve accepted a fee policy that TourDash approved. Your Payments page shows the current disclosure.
Questions about your TourDash plan? Contact us.
Do travelers need an account?
No. They enter their name and email, add a phone number if they like, and accept your booking terms.
Which website builders does it work with?
Any website where you can add your own HTML code, for example in a custom HTML block. If you can’t add code, link a button to your booking link instead.
Why does my website need approval?
For security, the widget only opens inside websites TourDash has allowed. Send us your website’s address and we’ll add it. Until then, the code shows a button that opens your secure booking page, so travelers can still book.
Can a button open one specific tour?
Yes. Each tour has a booking code you add to the widget code. It opens that tour straight at its dates.
Can travelers change or cancel their booking?
Yes, from the link in their confirmation email. They can choose another date, cancel under your terms, or update their contact details.
How do I know a booking came in?
It appears on the departure in Tours, and TourDash emails it to your booking notification address.
Can I try it before going live?
Yes. Preview your saved setup on a sample page. It creates no bookings or payments. Once bookings are on, completed bookings are real, so test with a free tour and cancel it afterwards.
Start with one tour.
Set up a free tour, make a test booking, then add the widget to your website.