Set up your booking widget and take your first direct booking
Create a tour, add its departure times, write the listing travelers see and turn on online booking. Then share your booking link, add the widget to your website and make a test booking from start to finish.
Before you start
- You’re a company owner in TourDash. Managers can prepare tours in their cities, but only an owner can turn on online booking, change widget settings and connect payments.
- Your tour’s basics: name, city, meeting point, departure times, ticket types (adults, children…) and the most travelers one departure can take.
- A short description and at least one photo of the tour.
- Your cancellation terms, for example free cancellation up to 24 hours before.
- An email address for new-booking alerts and for travelers’ replies.
- For paid tours only: a Stripe account, or a few minutes to create one. Free and tip-based tours don’t need a payment account.
- To show the widget on your own website: access to edit it, or your web developer. Your booking link works without a website.
Process overview
- Create the tour and its booking option
- Add departure times
- Write the listing travelers see
- Turn on online booking
- Share your link and add the widget to your website
- Make a test booking
Steps 1–3 don’t put anything on sale. Step 4 does.
Once you turn on online booking, travelers can book your ready tours through your link and website. Completed bookings are real.
Step 1 Create the tour and its booking option
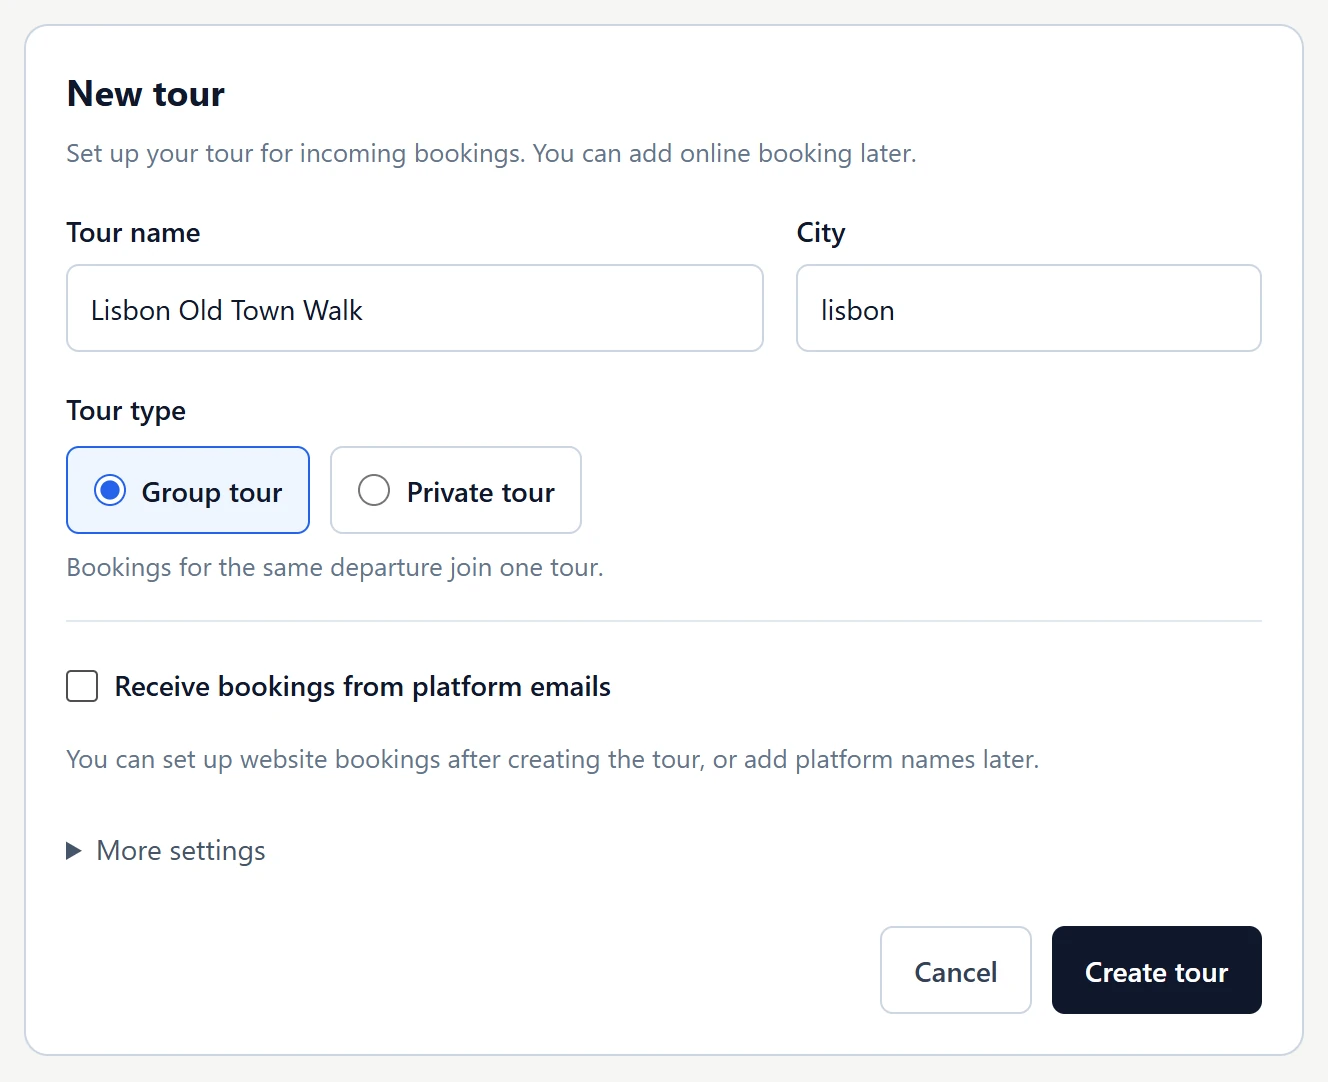
- In the sidebar, click Tour Setup, then New tour.

- Enter the Tour name and choose your City from the list.
- Choose Group tour if bookings for the same departure join one tour, or Private tour if each booking gets its own tour.
- If this tour sells only through TourDash, untick Receive bookings from platform emails. If it also sells on booking platforms, leave it ticked and enter the tour name exactly as it appears in their booking emails.
- Click Create tour.
Result
The tour opens, with Tour details at the top and the Website bookings, Schedule and Advanced booking settings sections below.
In Tour details, check the Short name and click Save operational details. It’s the name your Tours board and reports
show, and TourDash shortens long names automatically, for example Lisbon Old T
.
- Scroll down and click Advanced booking settings to open your tour’s booking option. TourDash created it with the tour.
- Enter the Duration (minutes) and the Capacity limit, the most travelers one departure can take.
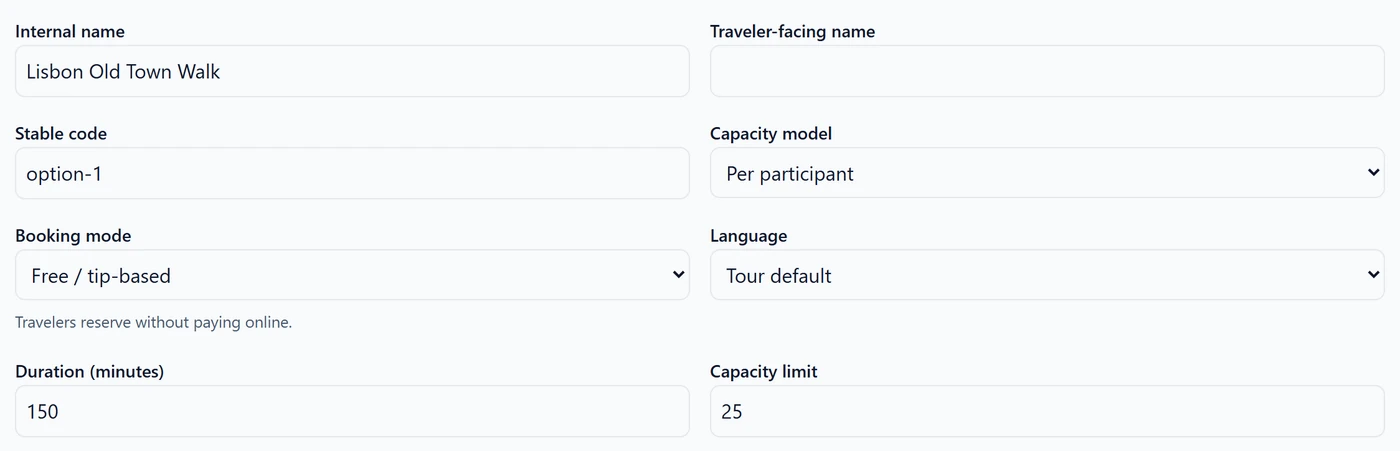
Online booking uses the duration set here.
Fill in Duration (minutes) in Advanced booking settings even if Tour details already shows one. Without it the tour can’t go on sale.
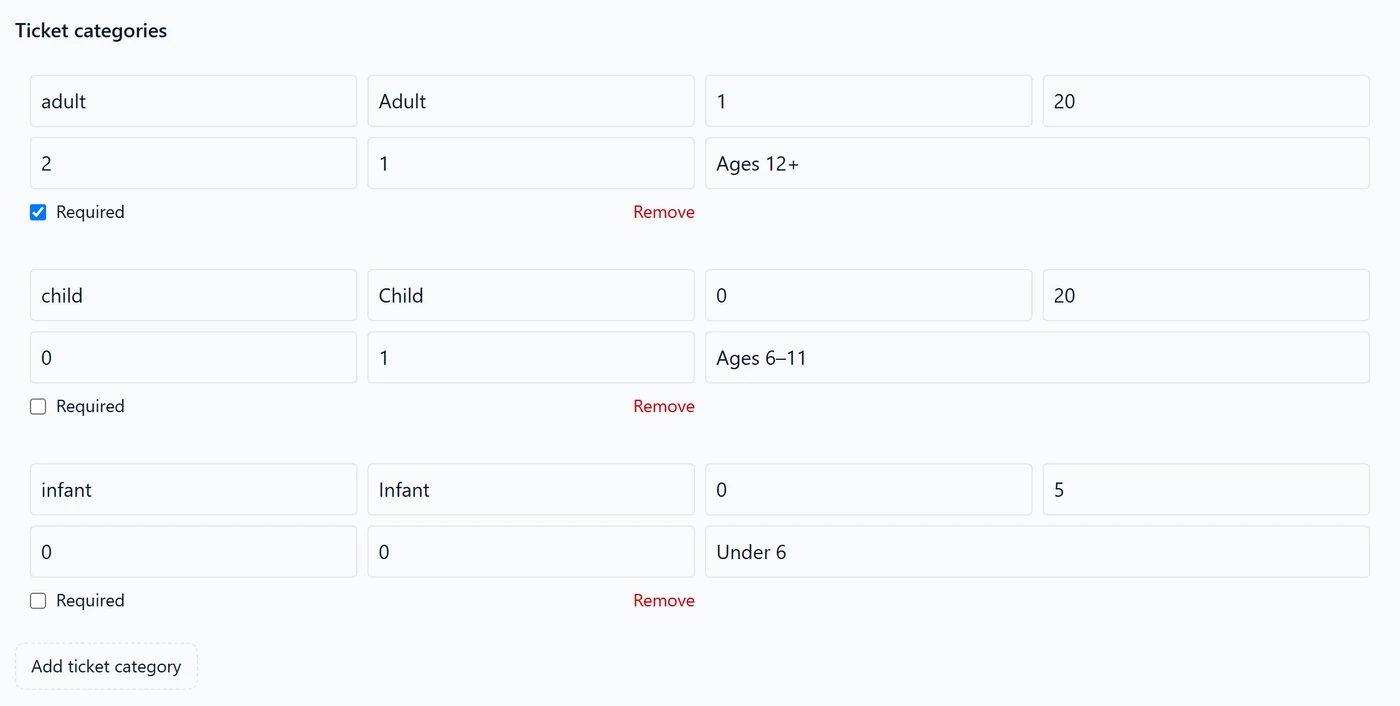
- Under Ticket categories, add one row per ticket type, for example Adult, Child and Infant. The boxes have no labels yet. In each row they are, in order:
- Code
- A short internal code, such as
adult. - Name
- What travelers see, such as Adult.
- Minimum, maximum
- How many of this ticket one booking can include.
- Default
- How many the booking form starts with.
- Places used
- How many places each ticket takes from the capacity. Use 0 for infants who don’t need a place.
- Age note
- Shown under the ticket name, such as
Ages 6–11
. - Required
- Tick it when every booking needs at least one, as with adults.
- Click Save option.
Result
TourDash shows Option saved.
Step 2 Add departure times
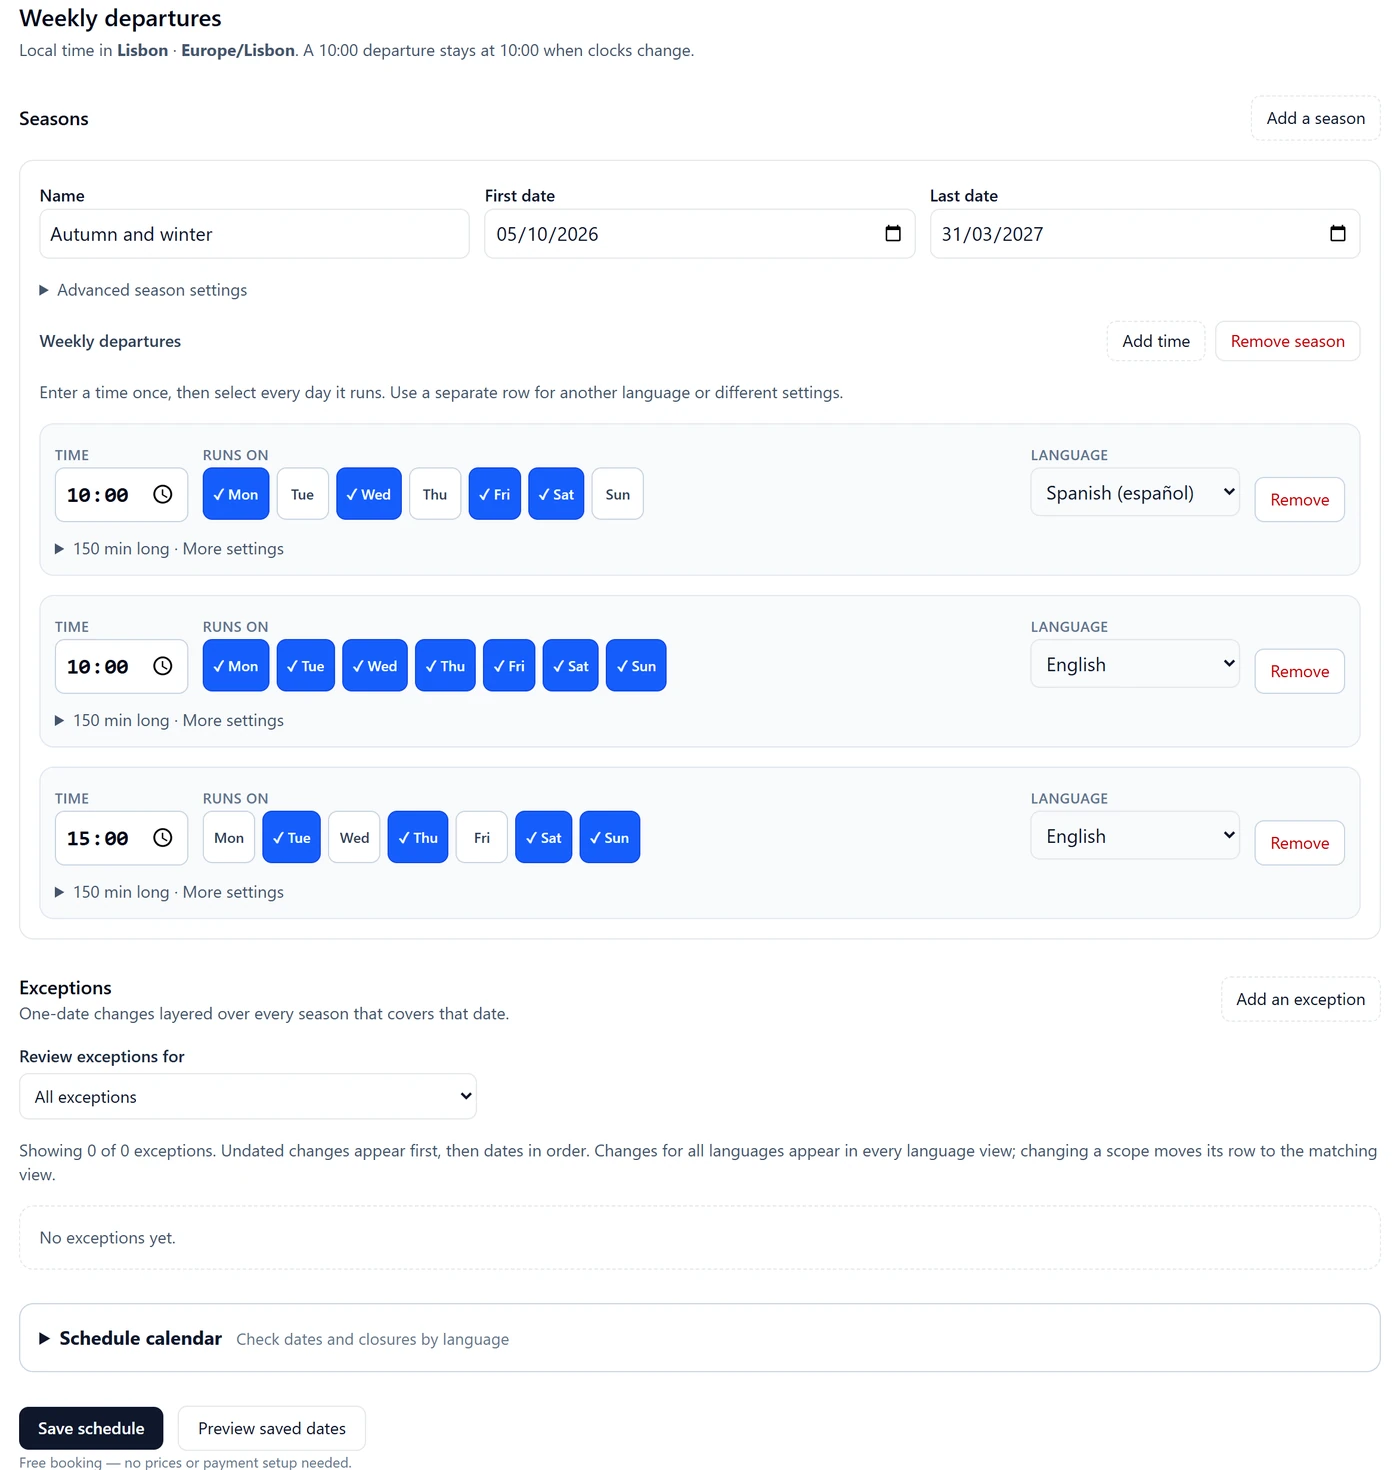
Departures come from seasons: a date range with weekly times. Each time can run on its own days and in its own language.
- On the tour page, find Schedule and click Manage.
- Click Add a season. Name it, then set its First date and Last date.
- Click Add time for each departure time.
- In each row, set the Time, click the days under Runs on and choose the Language. Add a separate row for each language, even at the same time.
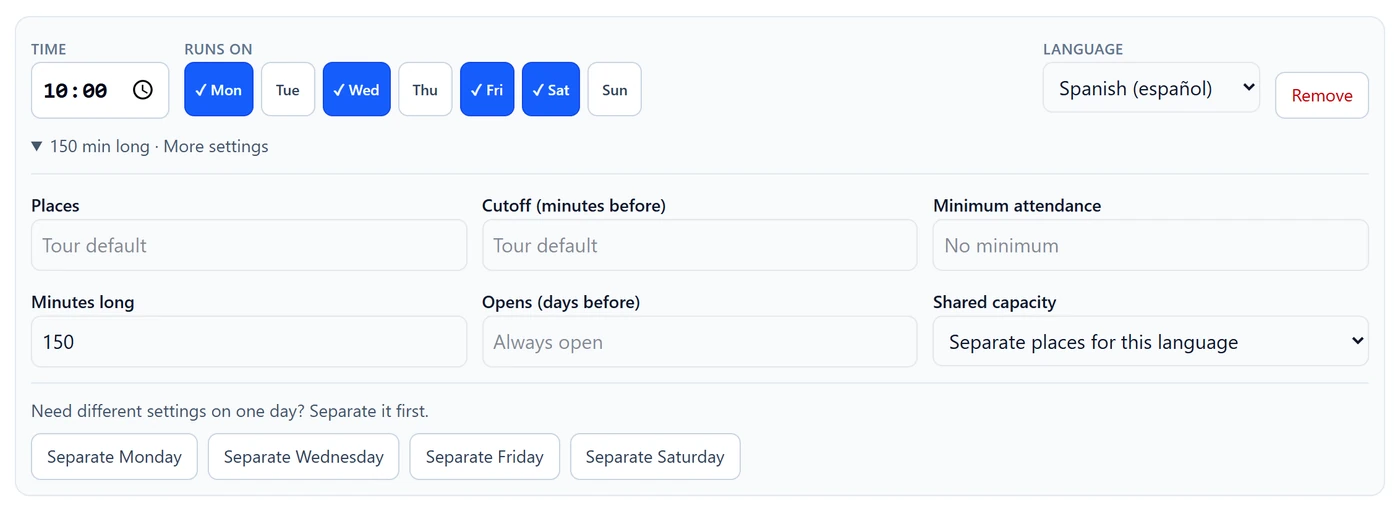
- Optional: click More settings on a row to change that departure only, for example its Places, booking Cutoff or Minutes long. Empty fields use the tour’s defaults.
- Click Save schedule.
Result
TourDash confirms with the number of seasons and weekly departures, for example Schedule saved: 1 season(s), 3 weekly departure(s).
Open Check upcoming departures to see the dates travelers will be offered.
Closed on a holiday, or adding a one-off departure? Use Exceptions below the seasons. They change single dates without touching the weekly pattern.
Step 3 Write the listing travelers see
Travelers read this under About this tour in the widget, and accept your terms before they book.
- At the top of the tour page, click Website bookings.
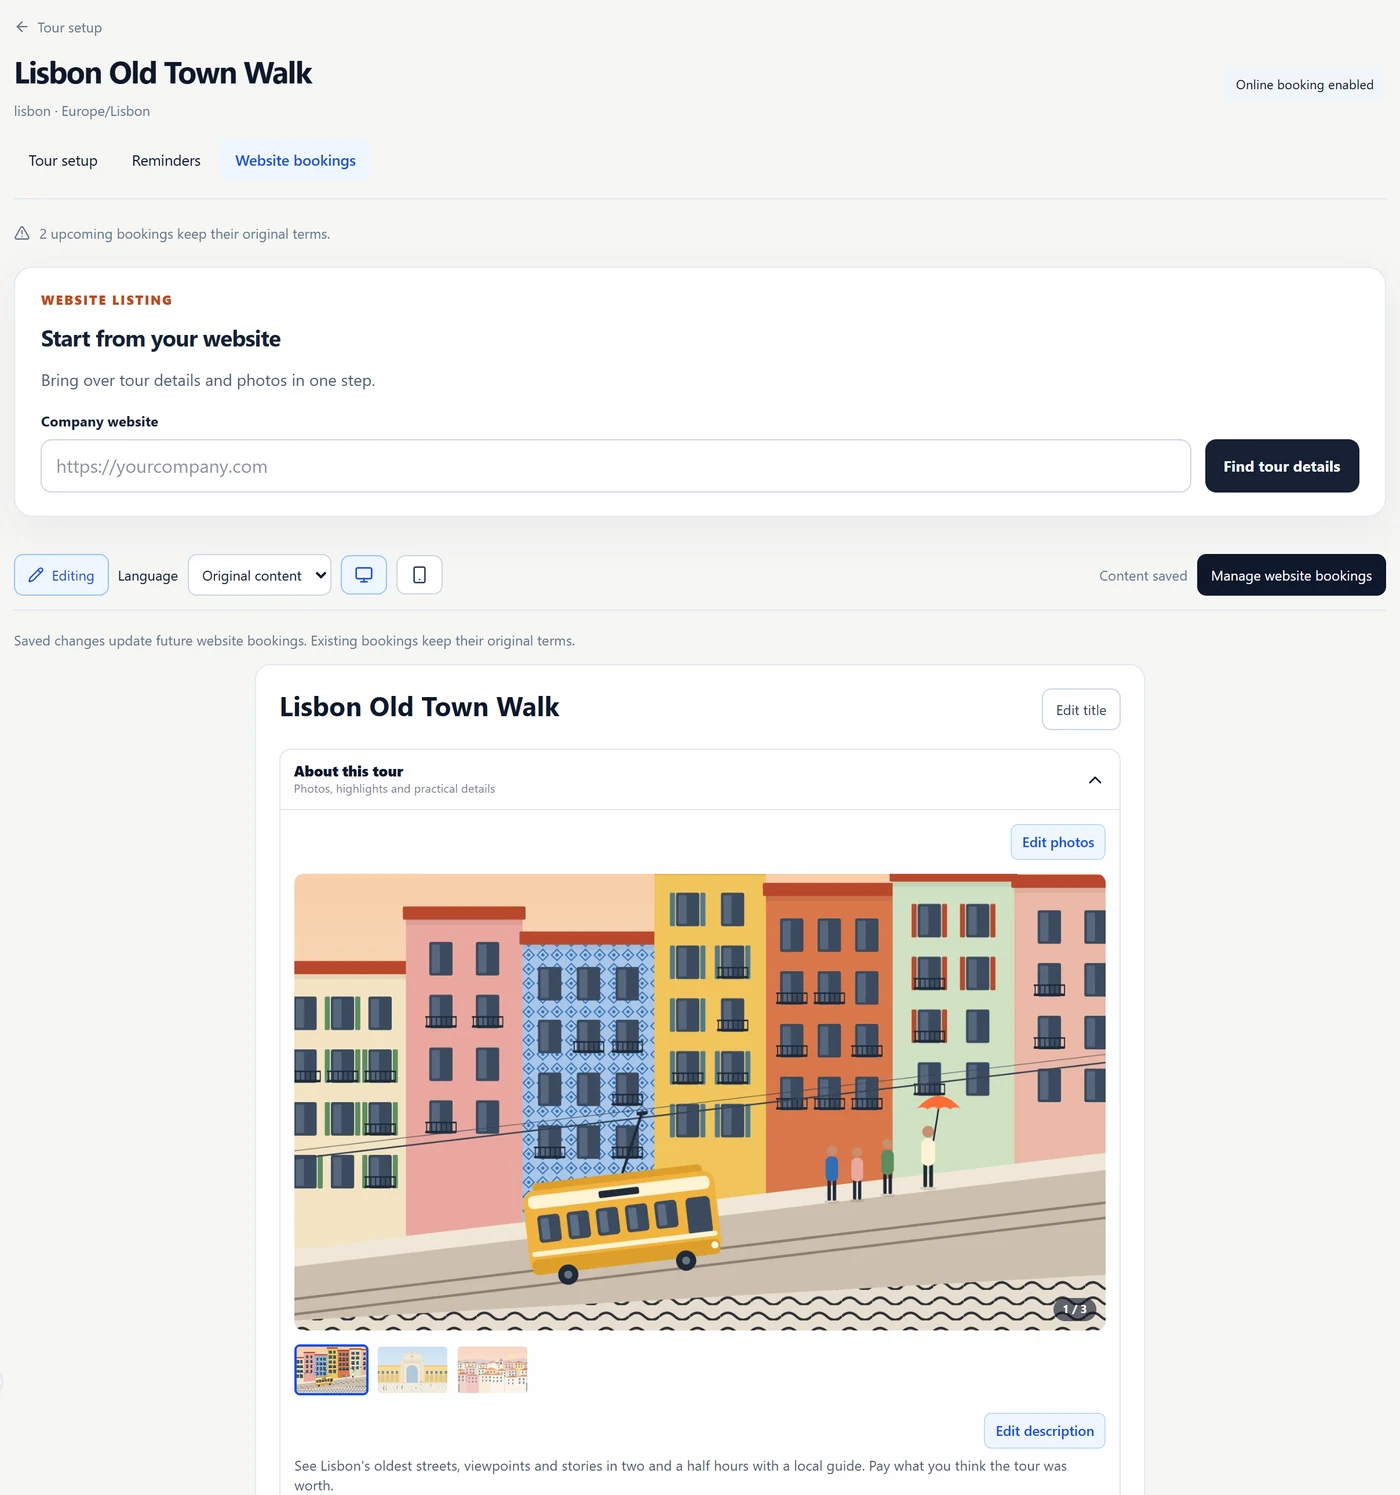
Already describe this tour on your own website? Start from your website can bring the details and photos over. Check everything it fills in before you save.
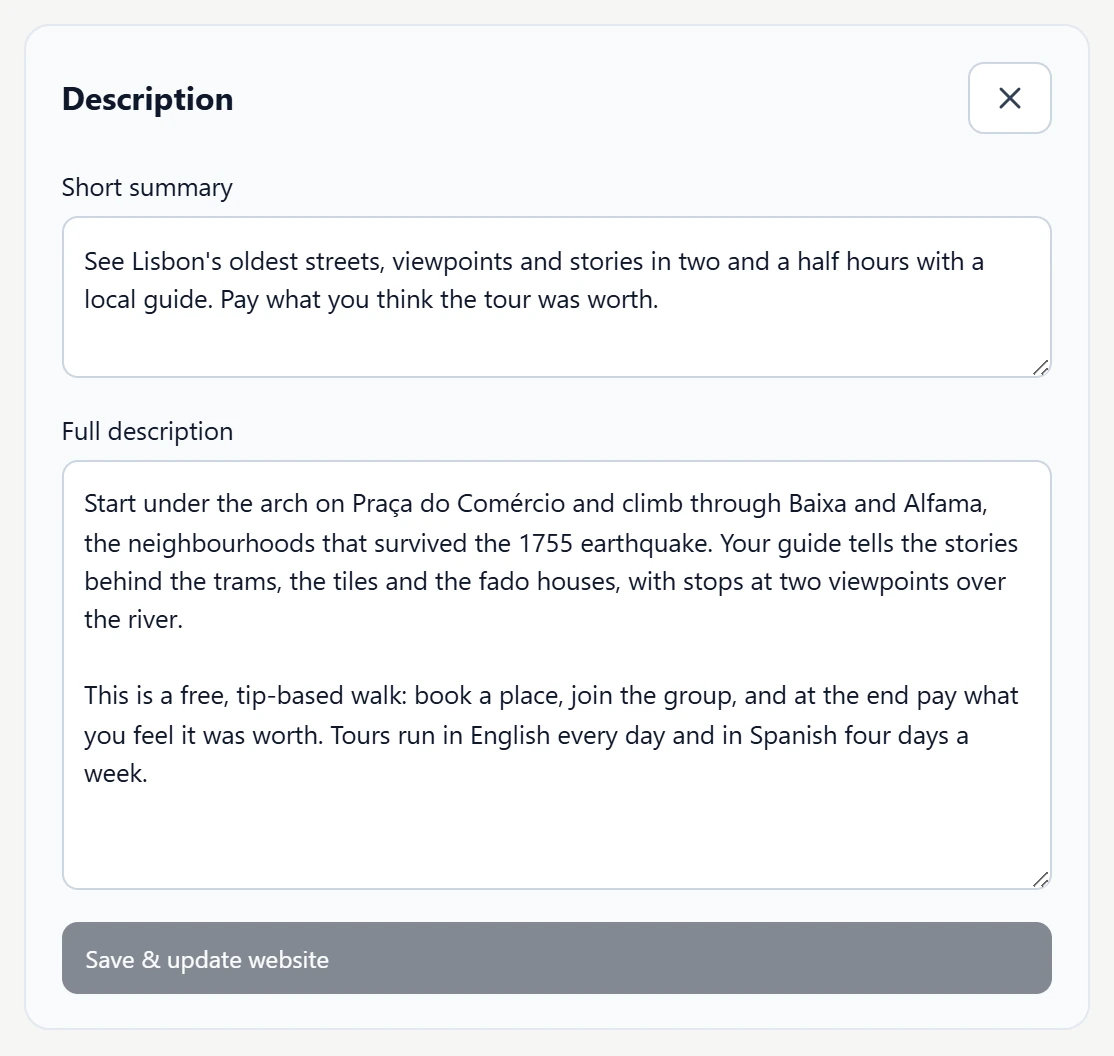
- Click Edit description. Write a Short summary of one or two sentences and a Full description, then click Save & update website.
- Click Edit photos, then Add image. For each photo, write Alternative text describing it and click Save. Click Make cover on the photo travelers should see first.
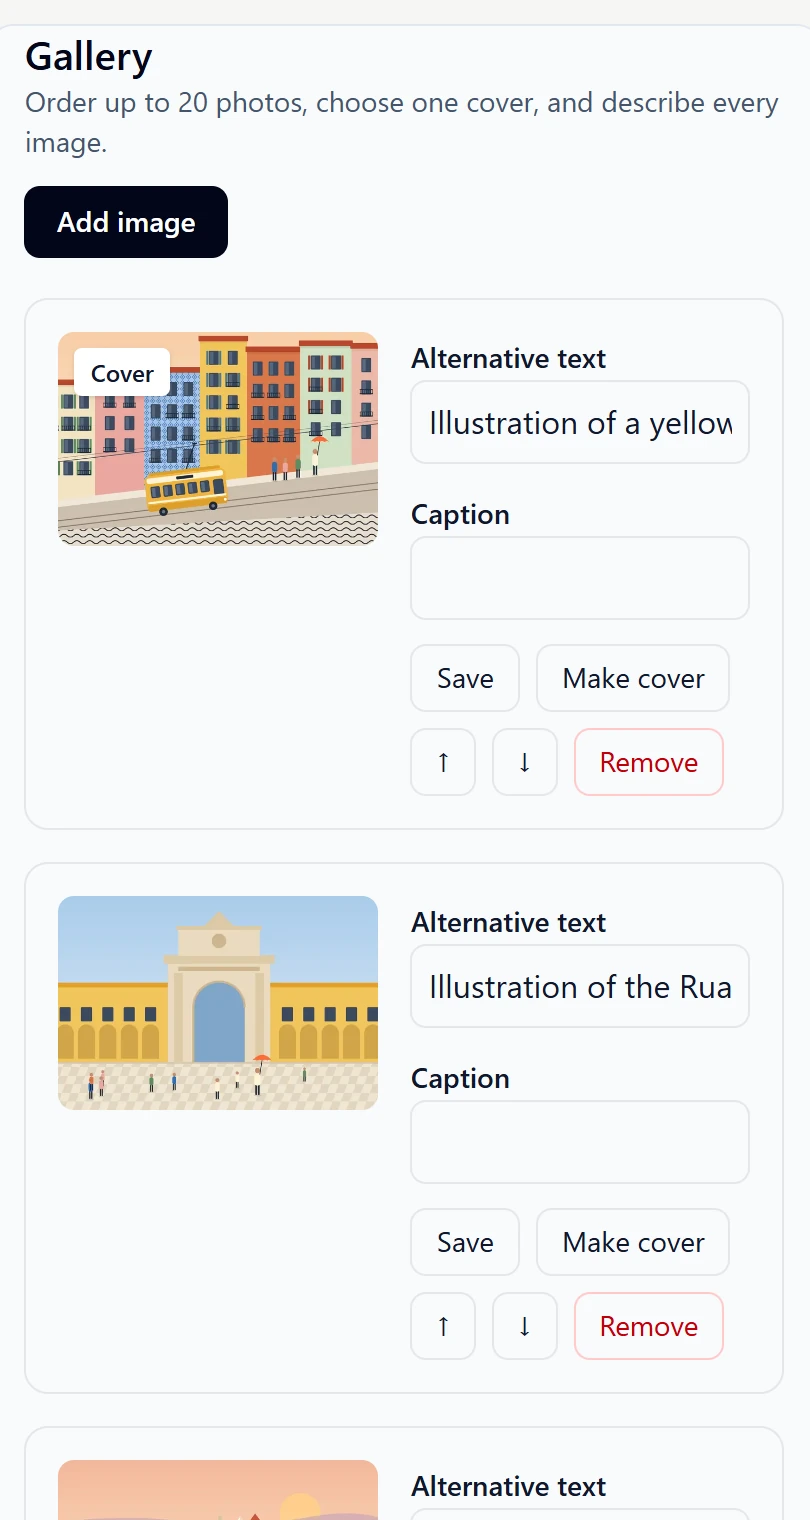
You need at least one photo, with a cover.
Add up to 20. Alternative text helps travelers who use screen readers.
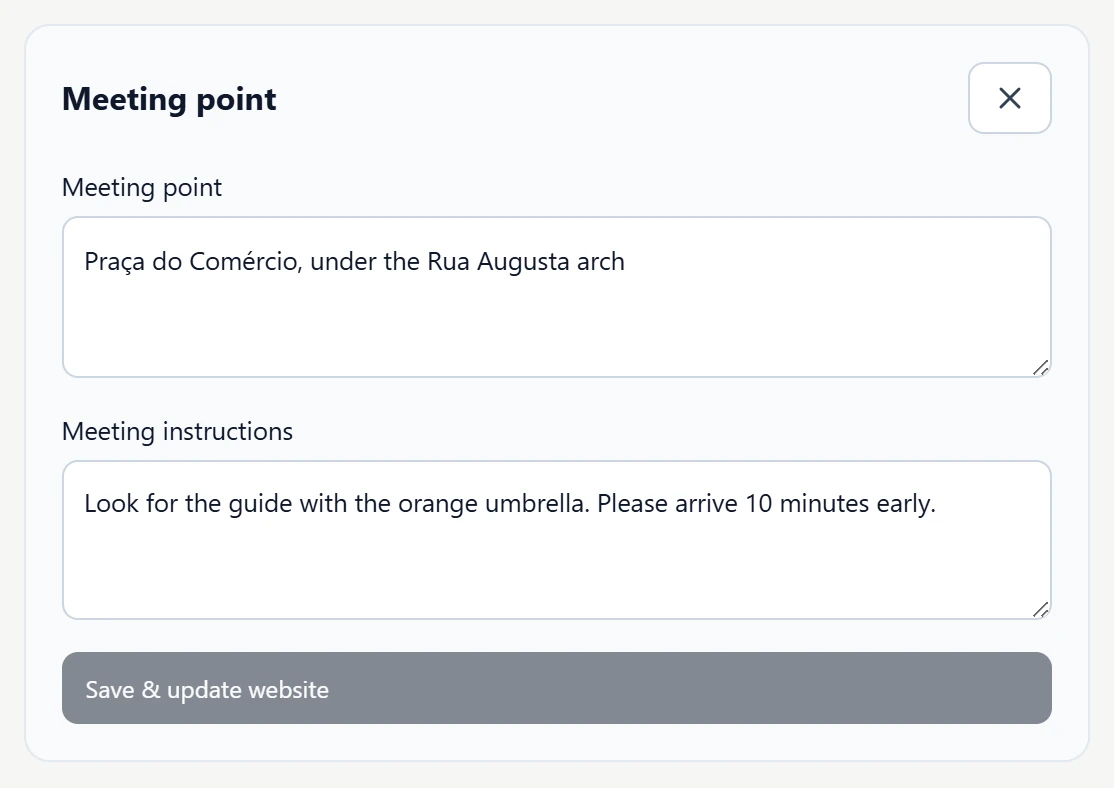
- Click Edit meeting point. Enter the Meeting point and the Meeting instructions, for example what the guide holds up. Both appear in the traveler’s confirmation email.
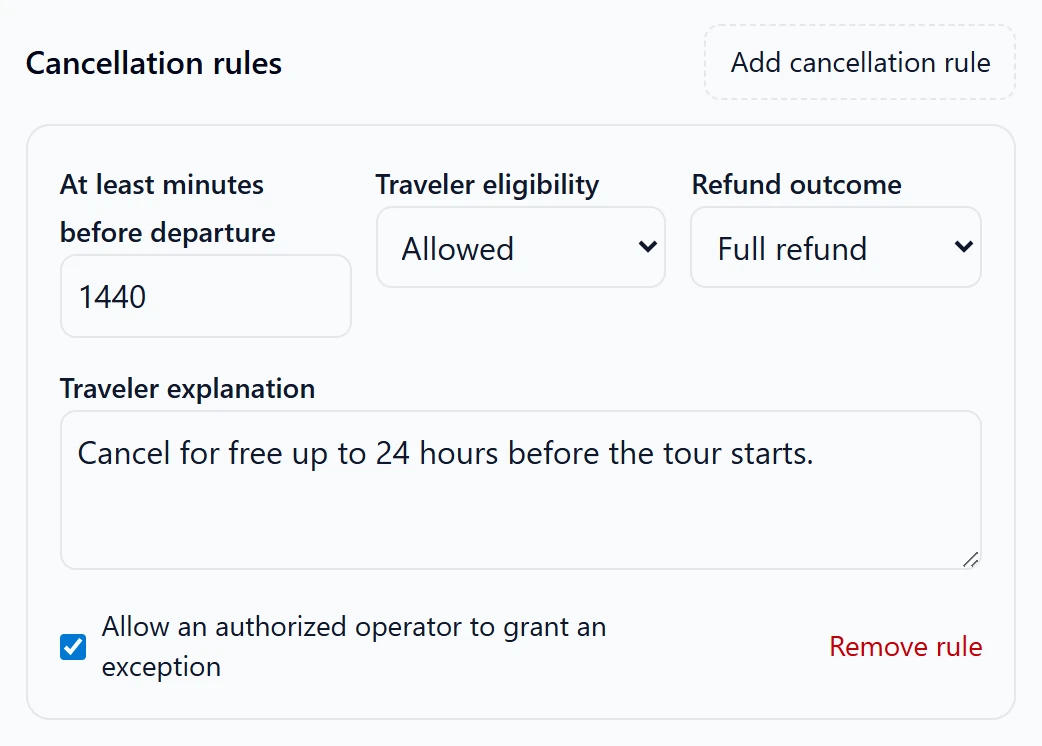
- Click Cancellation & booking terms, then Add cancellation rule. Set At least minutes before departure (1440 is 24 hours), who can cancel and the refund, and write the Traveler explanation. Click Save policy.

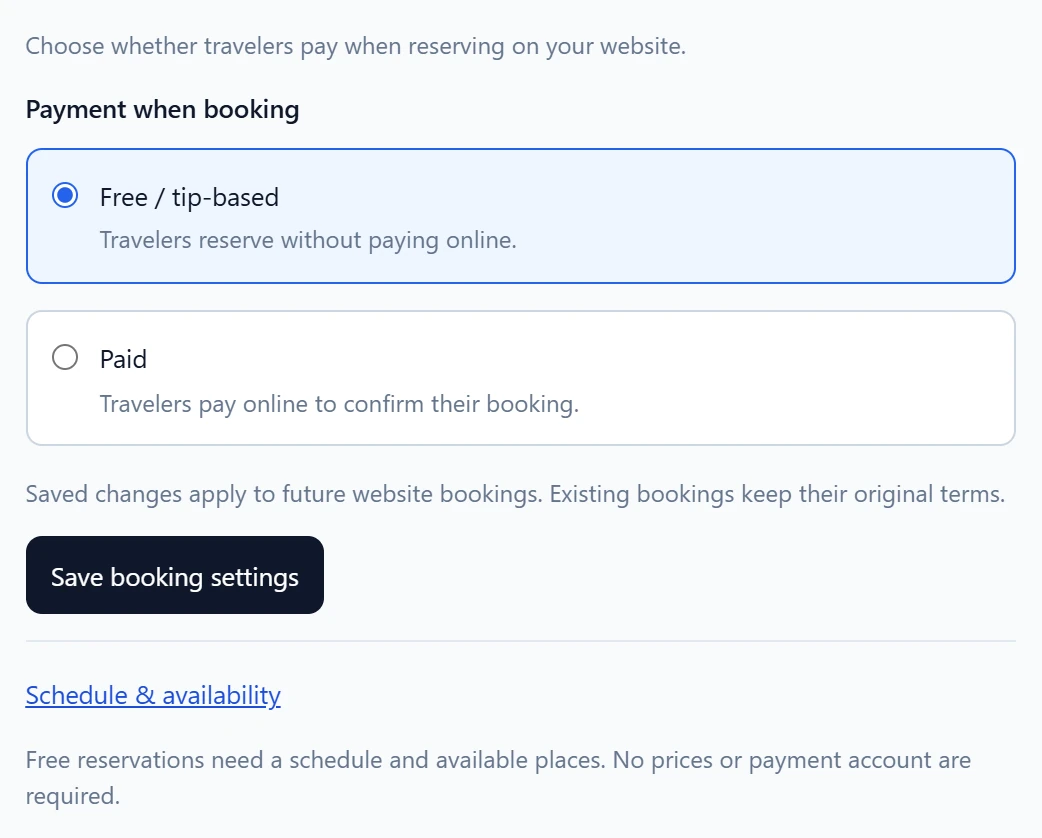
- Click Free or paid bookings, choose Free / tip-based and click Save booking settings. Selling tickets? Set up a paid tour instead.
- In Settings › General, enter a Booking notification email and click Save.
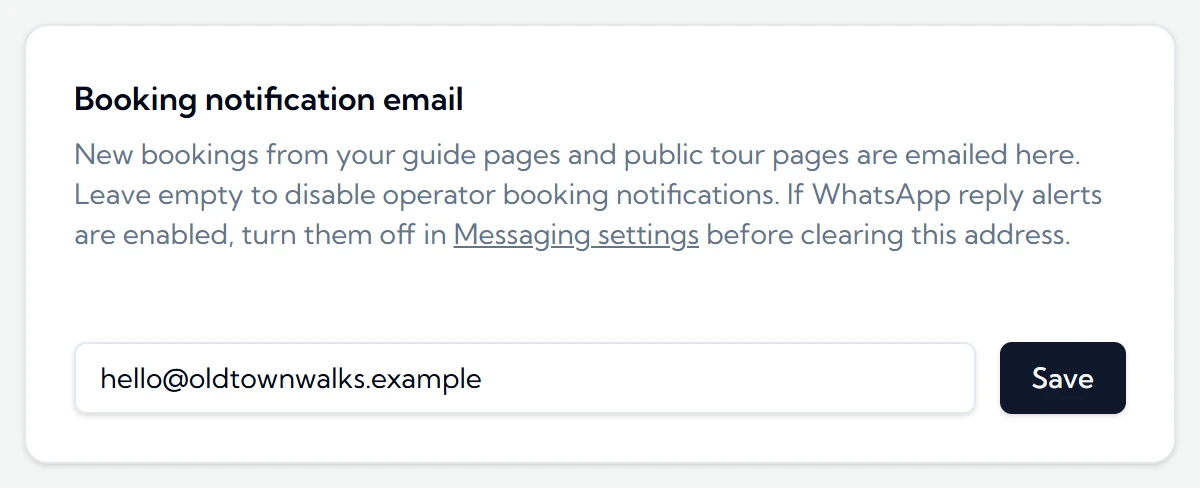
This address does two jobs.
New-booking alerts go to it, and it’s the contact on travelers’ confirmation emails, so their replies reach you. Without it you get no alerts and replies go nowhere.
Contact & confirmation in Website bookings isn’t needed for the widget. Travelers see your meeting details and reply to the address above.
Step 4 Turn on online booking
- In Website bookings, click Manage website bookings.
The checklist shows what’s left: fix each item with the button beside it, then click Re-check. When the only item left is about the widget channel, such as
There is no live widget channel
orThe widget channel is “draft”
, click Continue to widget settings.
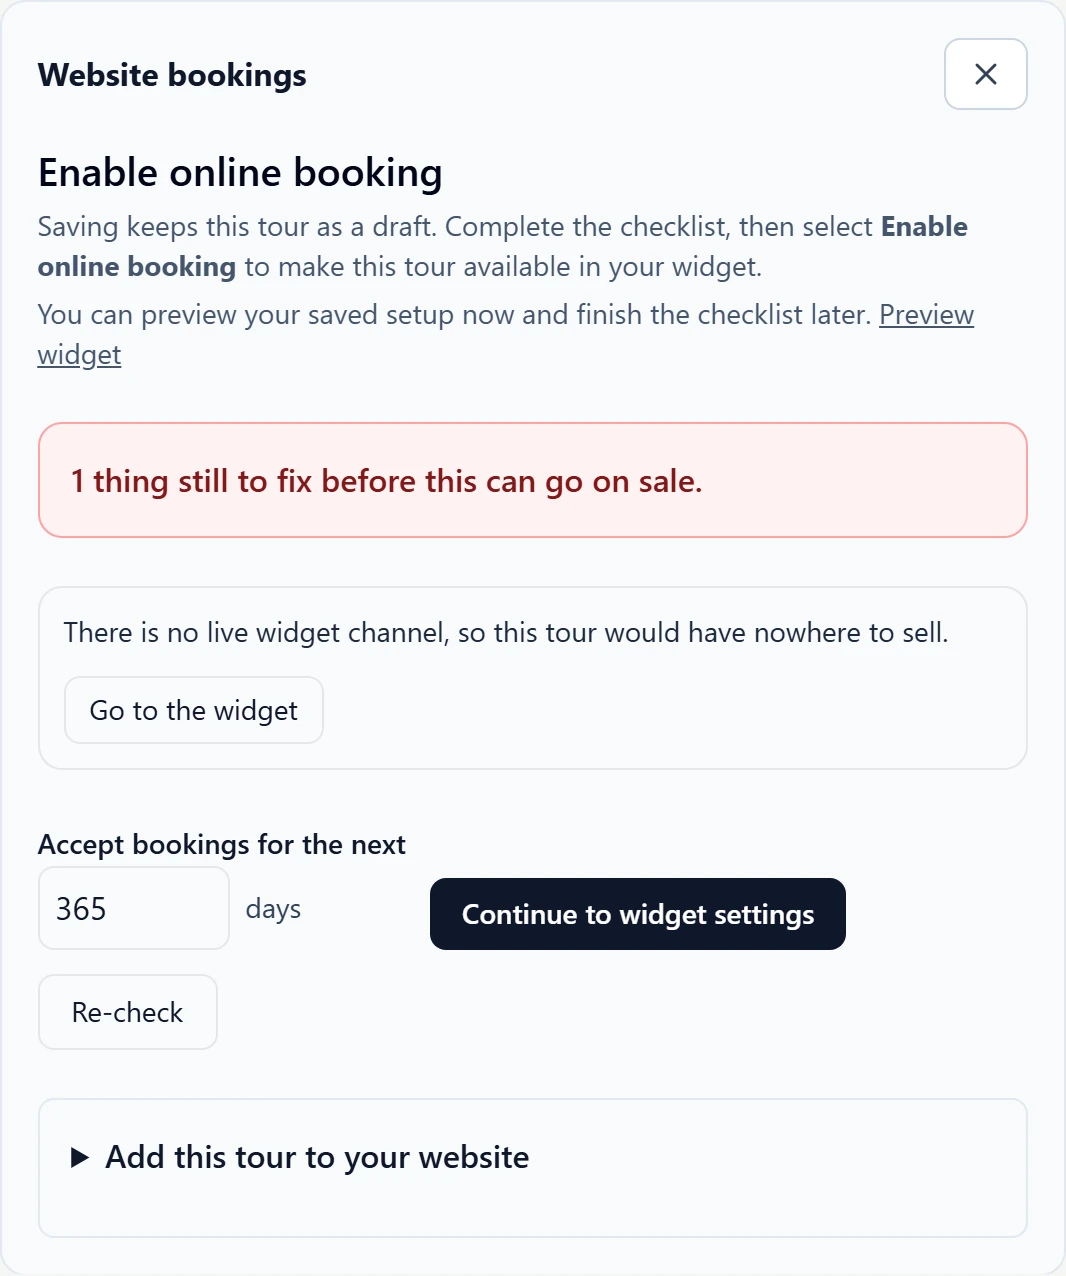
Your first tour goes on sale from Widget settings.
Once your widget is open, a new tour that’s ready shows Enable online booking right in this panel. Accept bookings for the next sets how far ahead travelers can book.
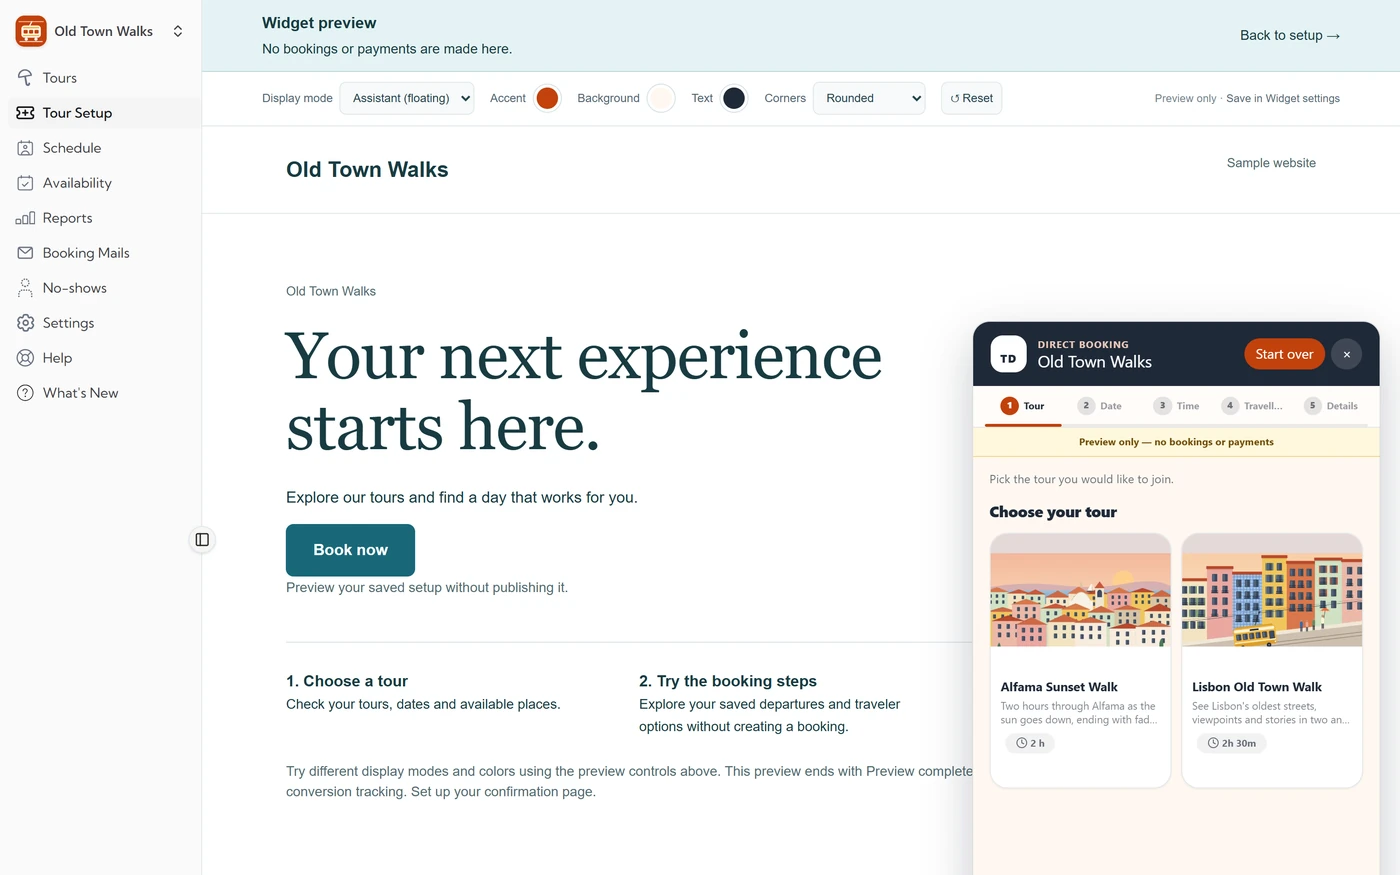
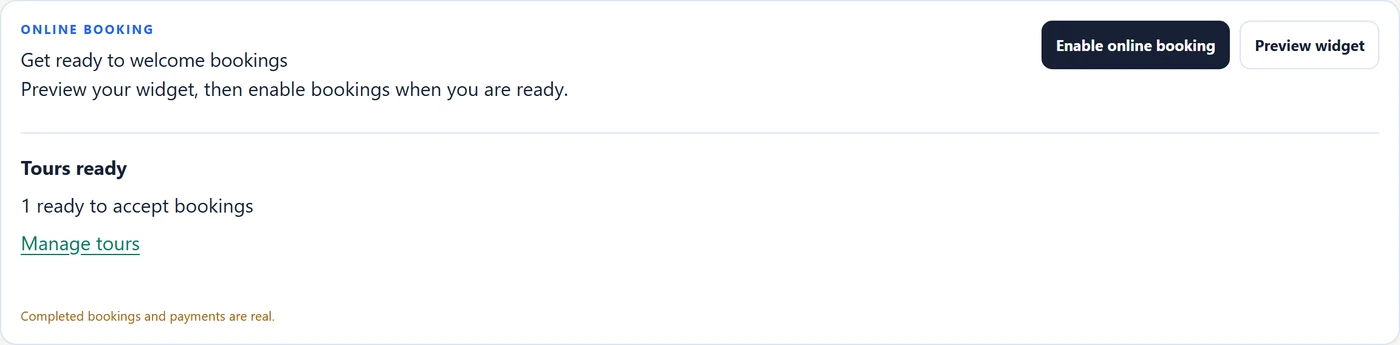
- In Widget settings, click Preview widget to try your saved setup on a sample page. Switch the Display mode and colours there. The preview creates no bookings or payments, and also shows tours that aren’t on sale yet.
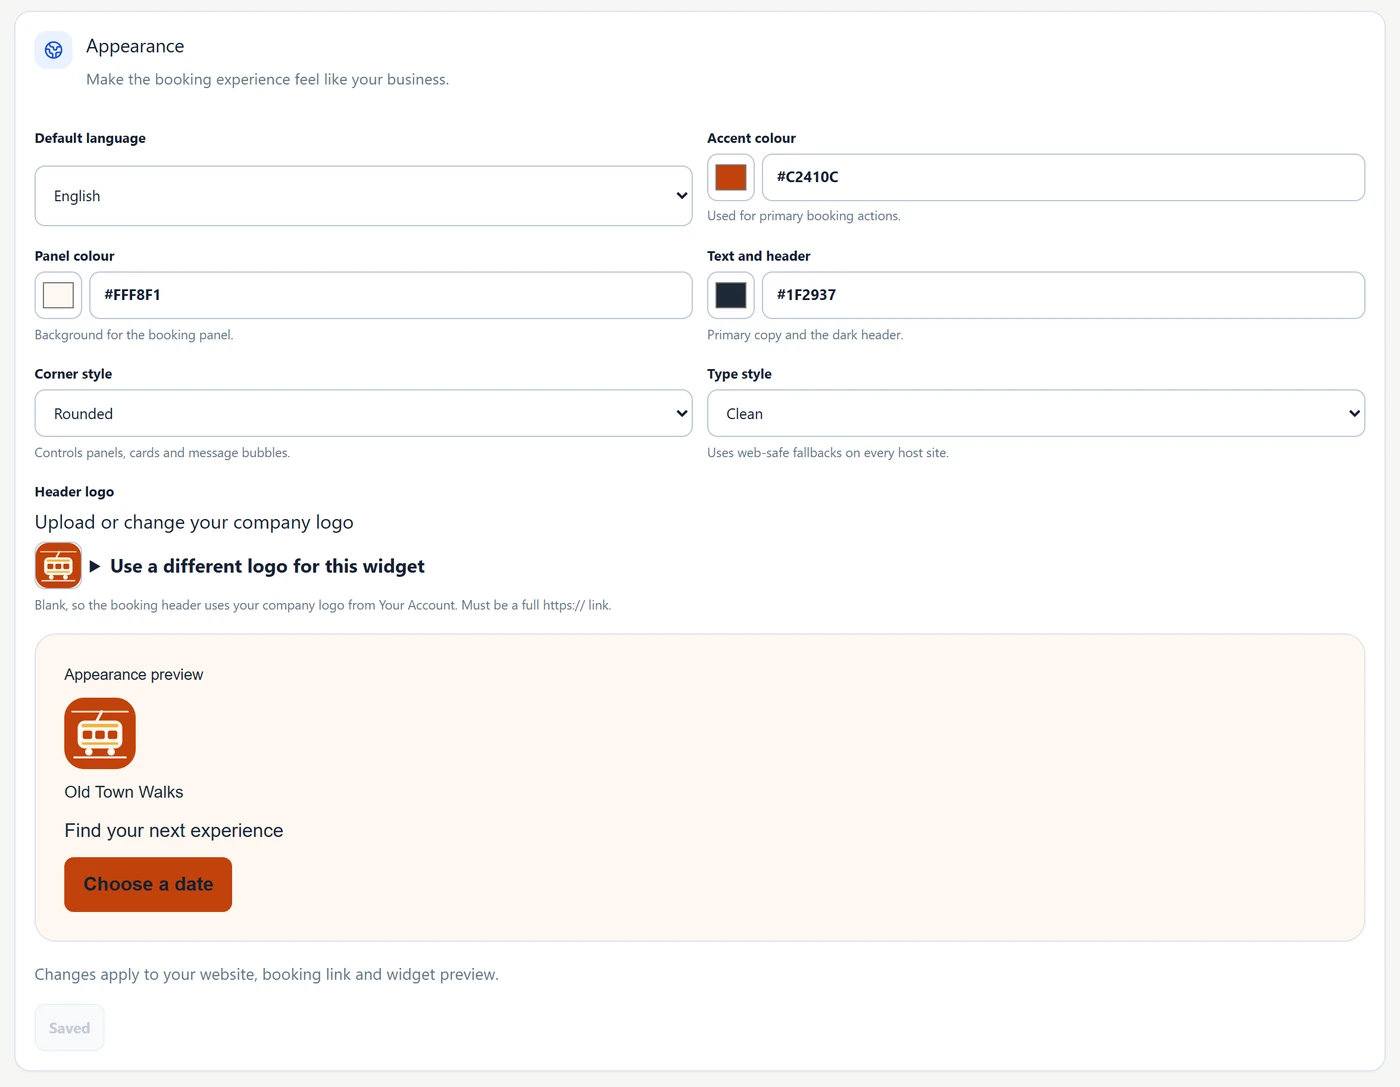
- Back in Widget settings, under Appearance, check the Default language and the Header logo. The header uses your company logo. To use another one, open Use a different logo for this widget.
- Set the Accent colour for buttons, the Panel colour for the background and the Text and header colour.
- Click Save changes. The button reads Saved when there’s nothing to save.
- Under Online booking, click Enable online booking.
Result
The panel says Your widget is open
, and Tours ready counts your
tour. Your booking link and website code now take bookings.
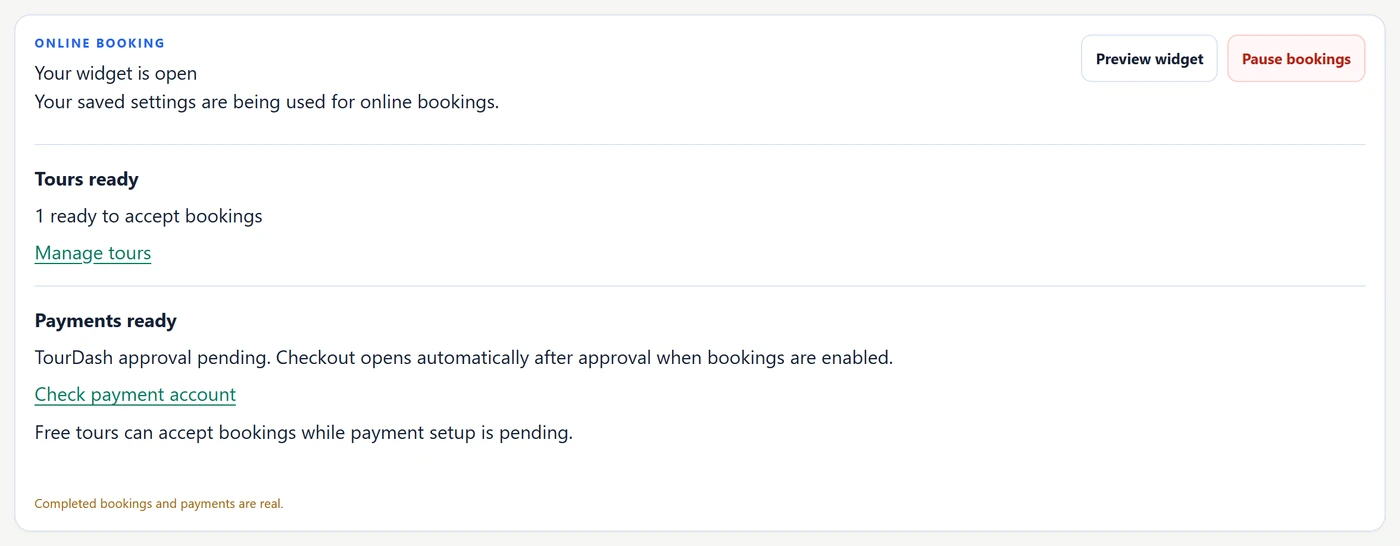
To stop new bookings for a while, click Pause bookings. Click Resume bookings to open them again.
Step 5 Share your link and add the widget to your website
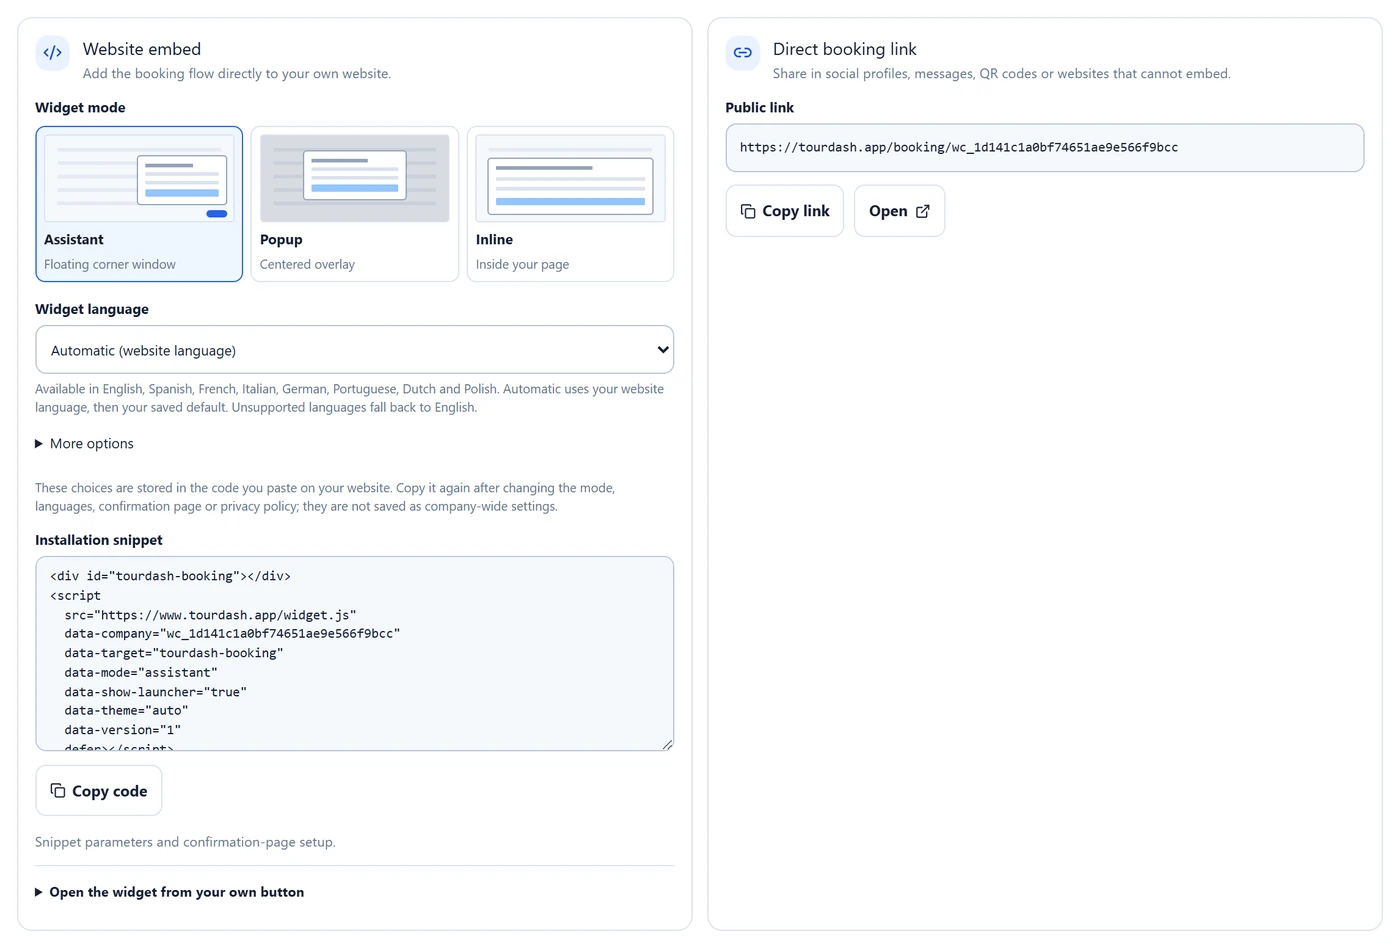
Scroll to Website installation in Widget settings. There are two ways to sell: a direct booking link and a website embed.
- Under Direct booking link, click Copy link. Share it on social profiles, in messages and QR codes, or link a button on your website to it. It works right away.
- To embed the widget in your own website, first email support your website’s address, for
example
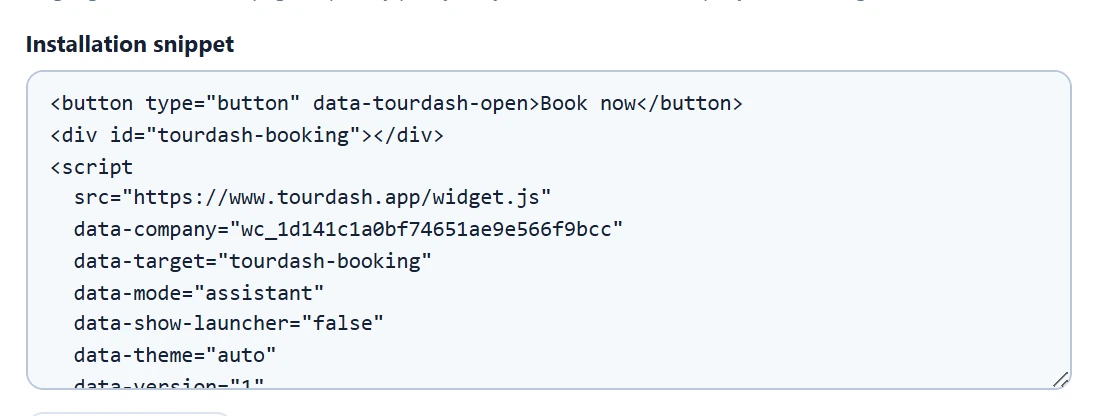
https://www.yourcompany.com. If your site also opens without www, send both. TourDash adds them for you. - Under Website embed, choose a Widget mode: Assistant (a floating corner window), Popup (a centered overlay) or Inline (inside your page).
- Choose the Widget language. Automatic (website language) follows your page’s language and falls back to your default.
- Optional: open More options to offer only some Departure languages, hide the floating booking button, send travelers to your own Confirmation page or link your Privacy policy.
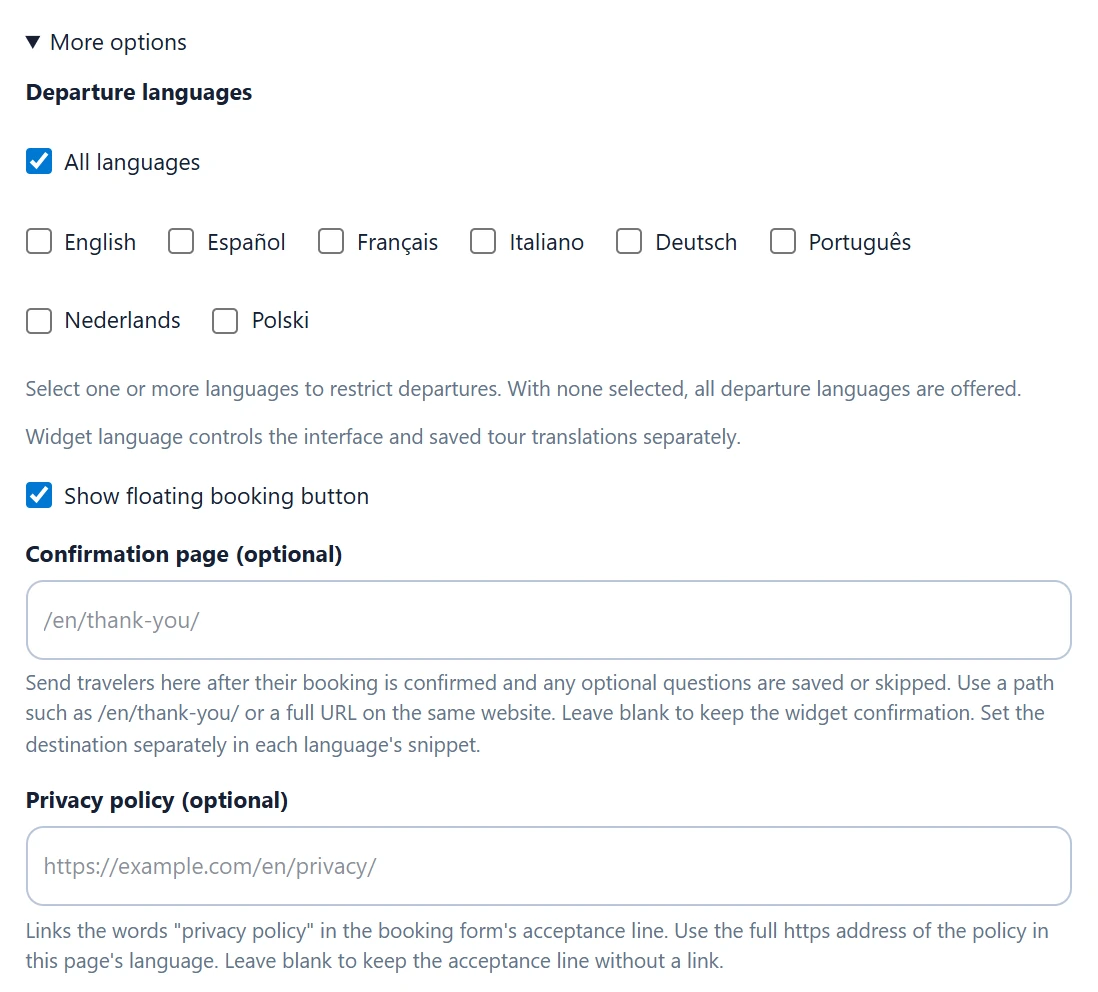
These choices are saved in the code, not in your settings.
Copy the code again after changing the mode, languages, confirmation page or privacy policy. Using several languages? Copy one snippet per language page.
- Click Copy code and paste it into the HTML of each page that should offer booking, for example in your website builder’s custom HTML block.
- Optional: open the widget from your own button. In Popup mode, or in Assistant mode with Show floating booking button unticked, the code starts with a Book now button that has
data-tourdash-open. Style that button, or add the attribute to a button you already have, placed before the widget code.
Result
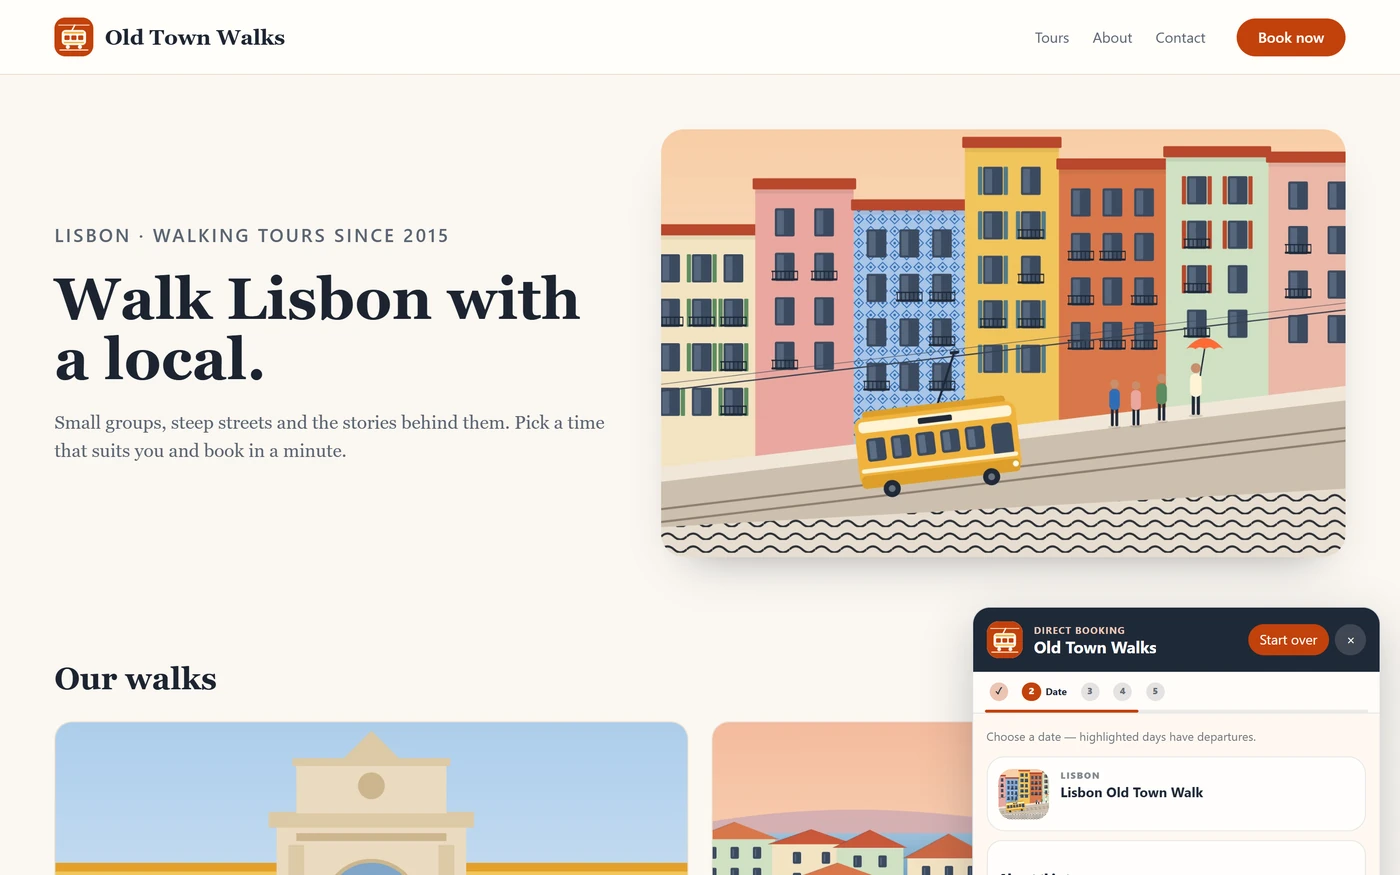
Your booking button opens the widget over your page. Travelers choose a tour, date, time and travelers, then enter their details.
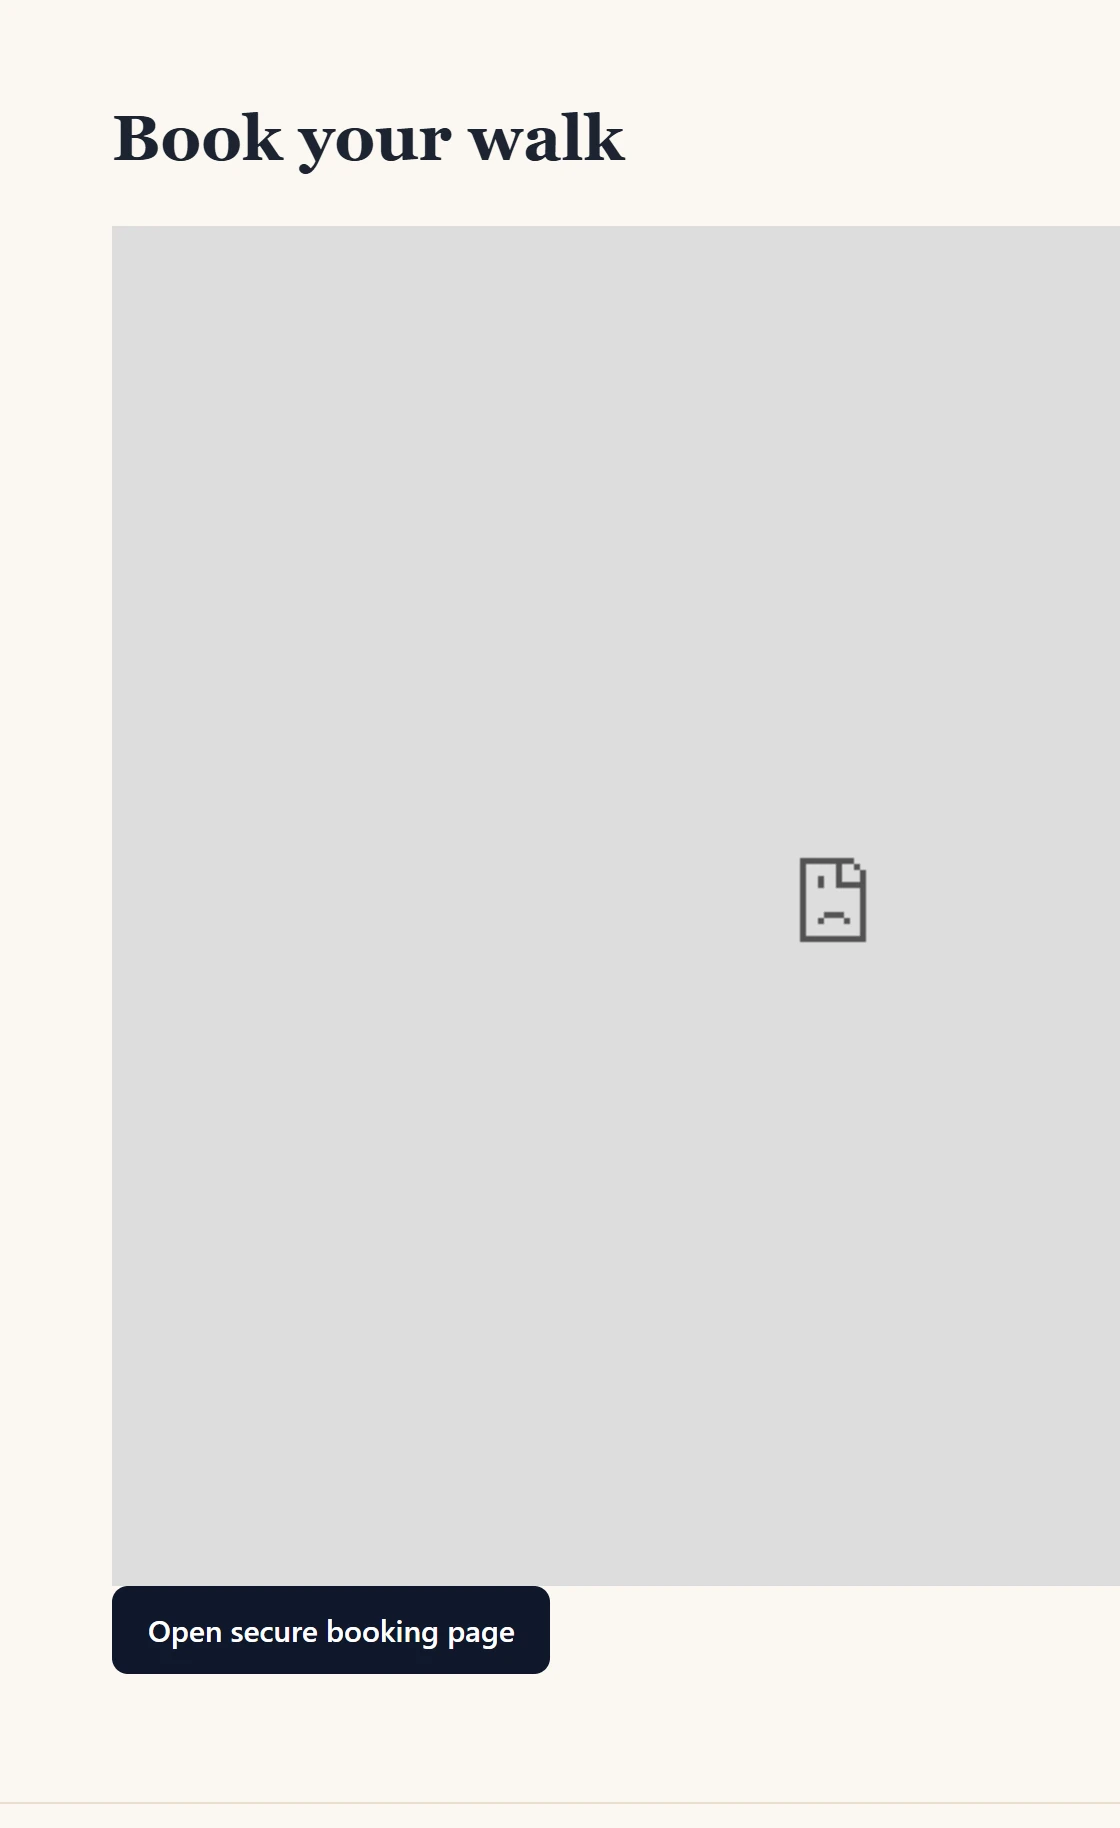
Only an Open secure booking page
button?
Your website isn’t on the allowed list yet, so the widget can’t load inside it. After 8 seconds the code shows this button instead, which opens your secure booking page, so travelers can still book. Email support your website’s address.
To open one tour directly at its dates, use Add this tour to your website at the bottom of that tour’s Manage website bookings panel. Copy the
tour booking code into the opening <script> tag of your widget code.
Step 6 Make a test booking
Book a free tour yourself to check the whole journey, then cancel it. Test a paid tour with support instead: completed payments are real.
- Open your direct booking link, or the booking button on your website. Choose the tour, a date, a time and the travelers.
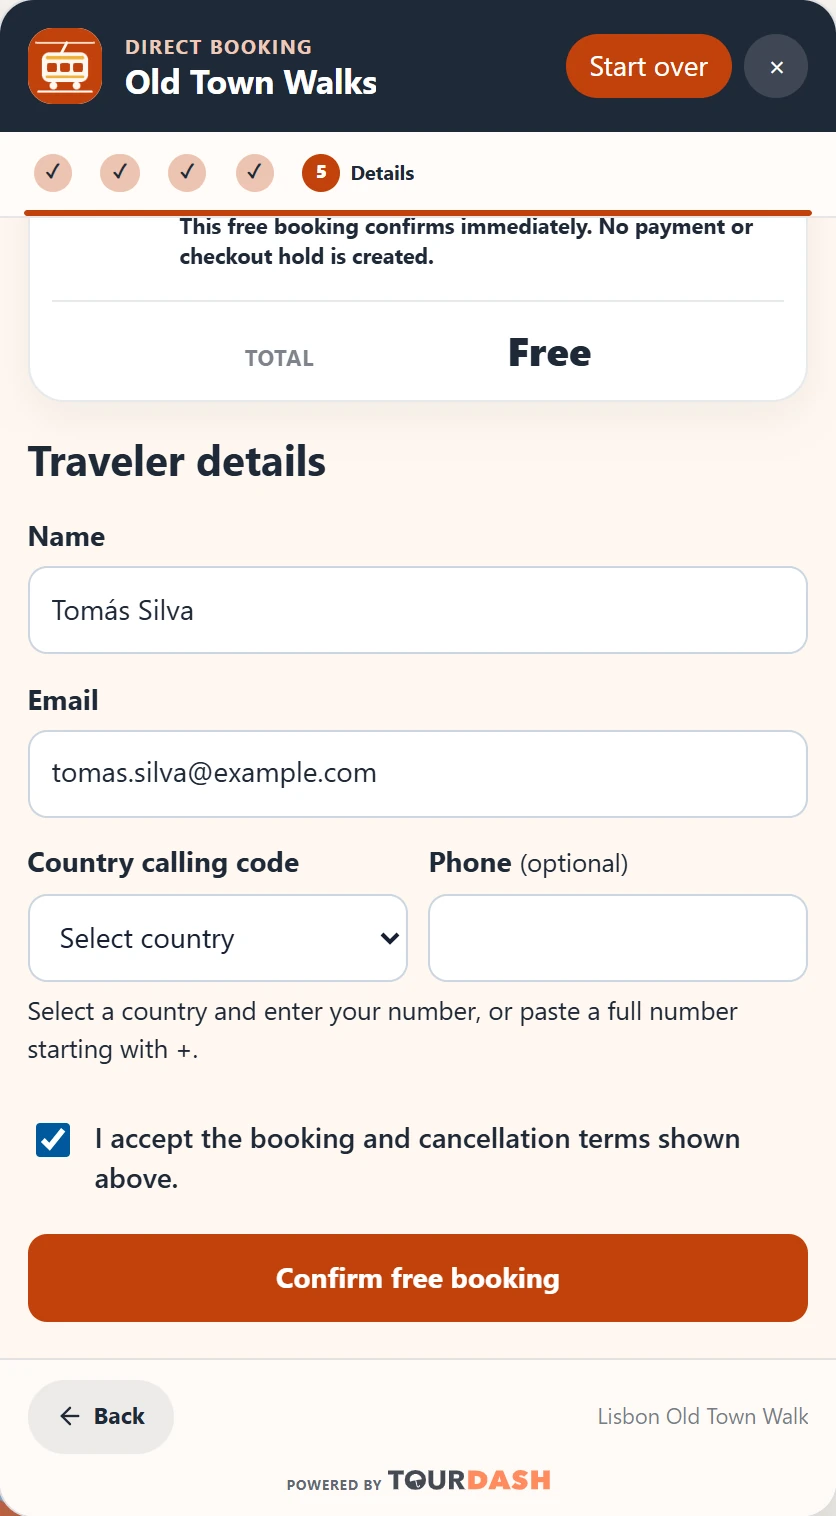
- Enter a Name and an Email you can check. The phone is optional.
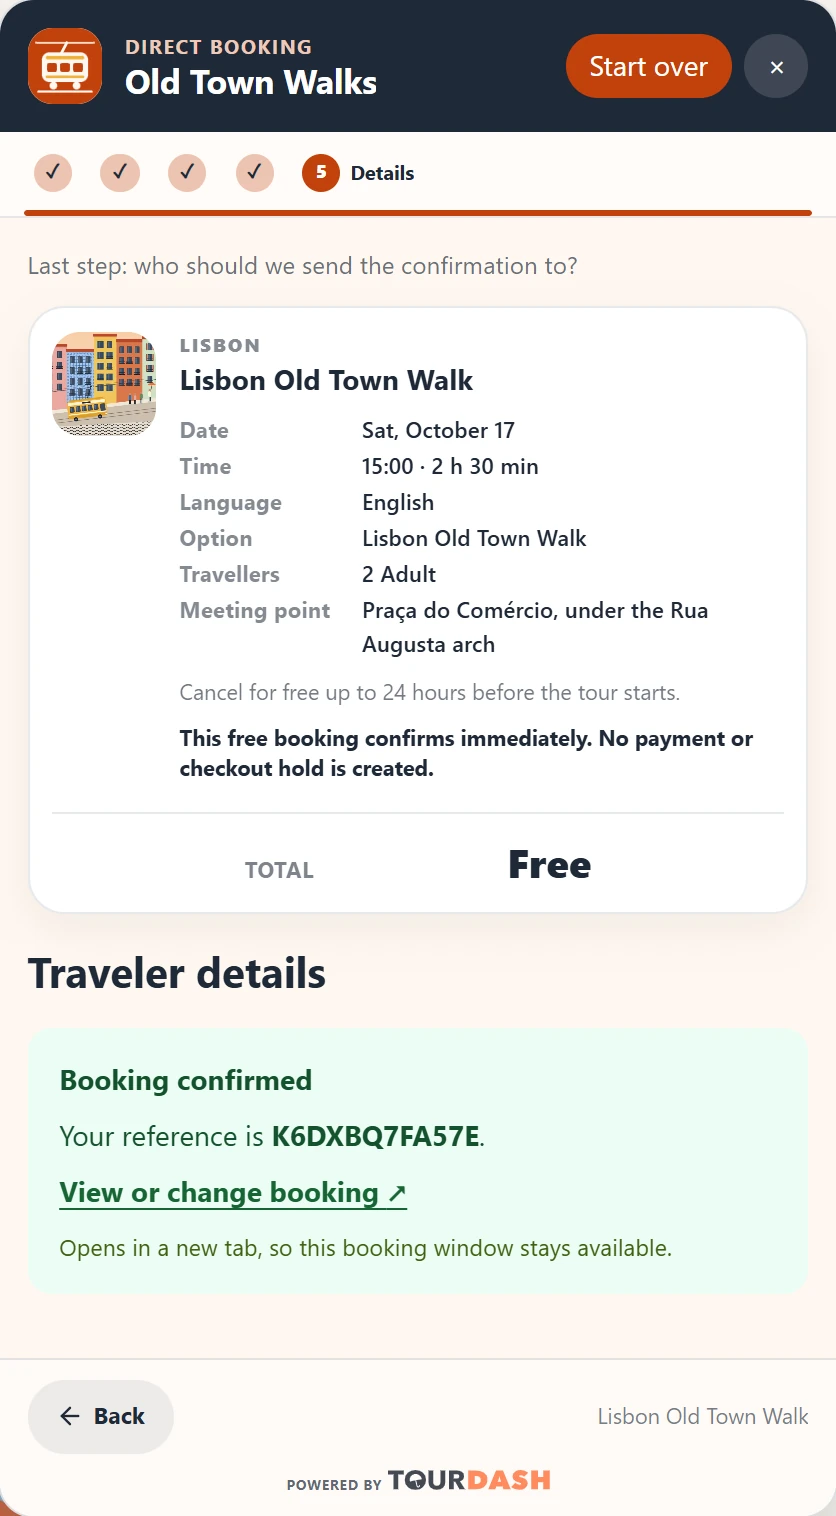
- Tick the booking and cancellation terms, then click Confirm free booking.
Result
The widget shows Booking confirmed
with a booking reference and View or change booking.
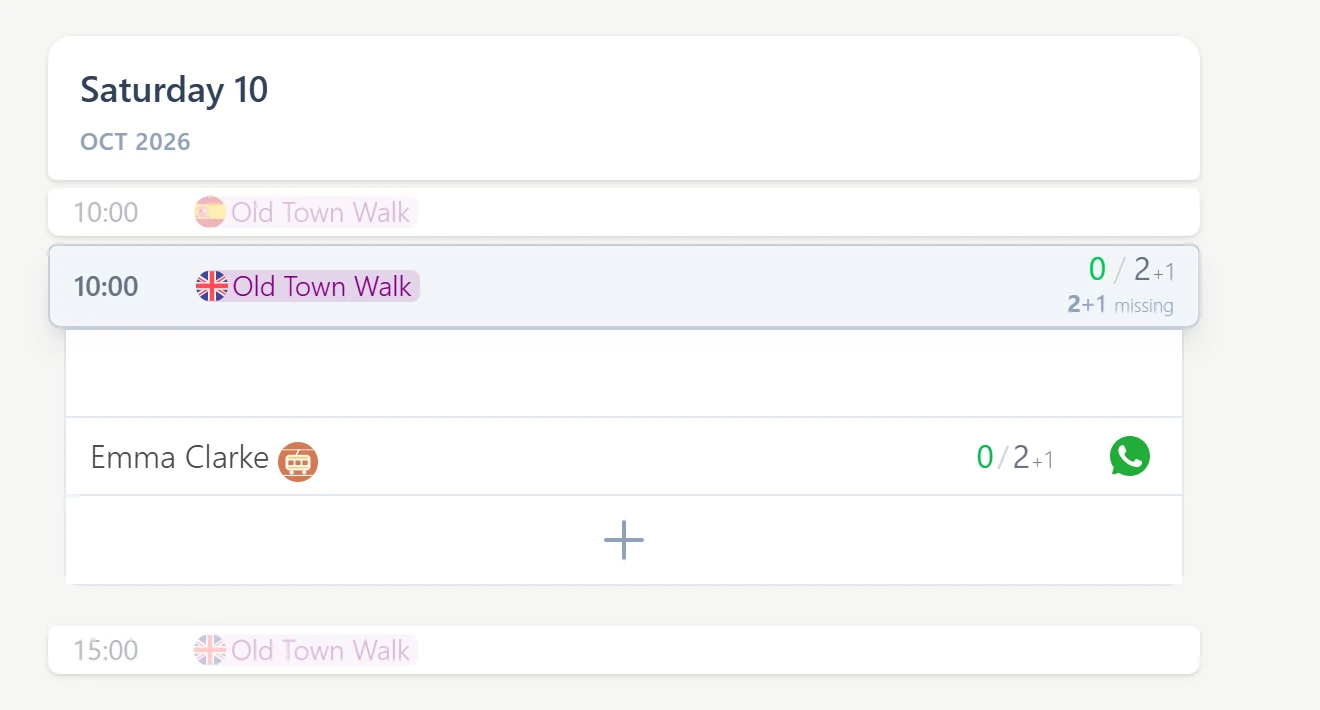
- In Tours, open the day and the departure. The booking shows your company logo, which marks a website booking.
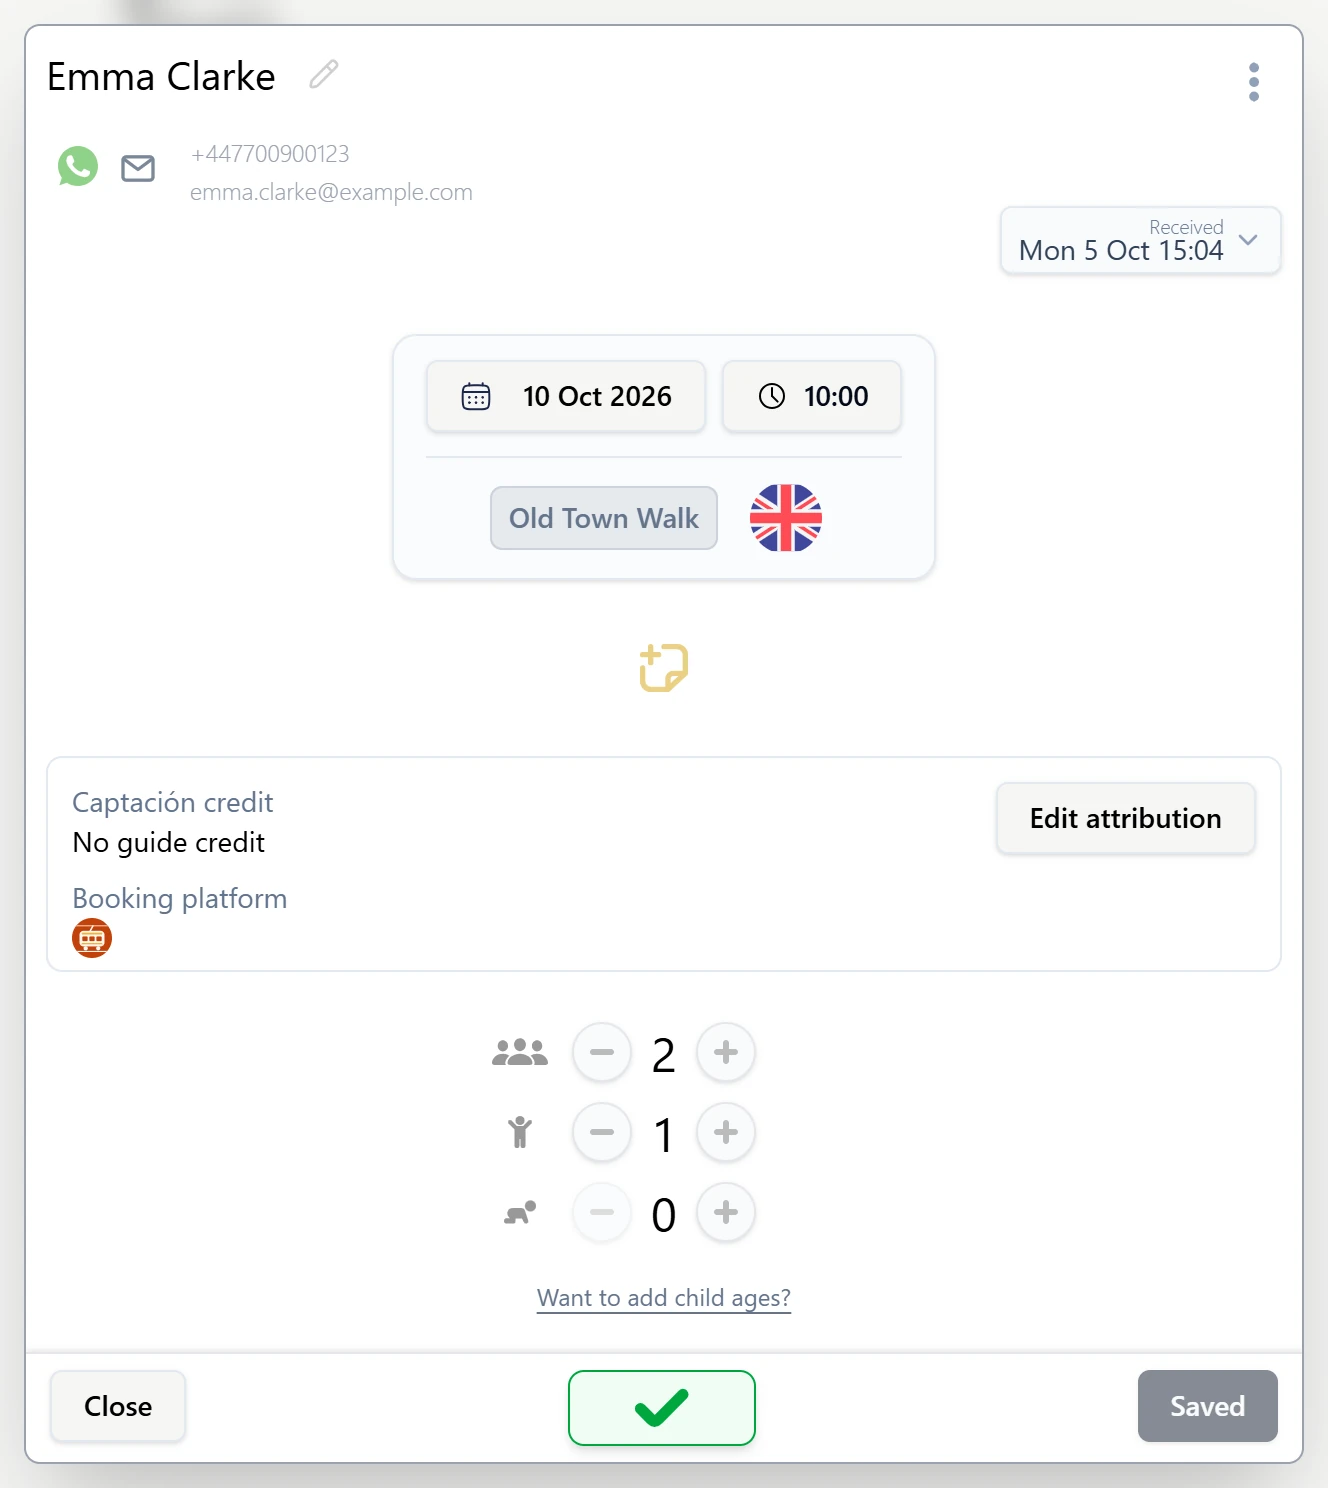
- Click the booking. Booking platform shows the same logo.
Result
Within a few minutes the traveler gets Your booking is confirmed
with a link to
manage the booking, and your Booking notification email gets New booking received
.
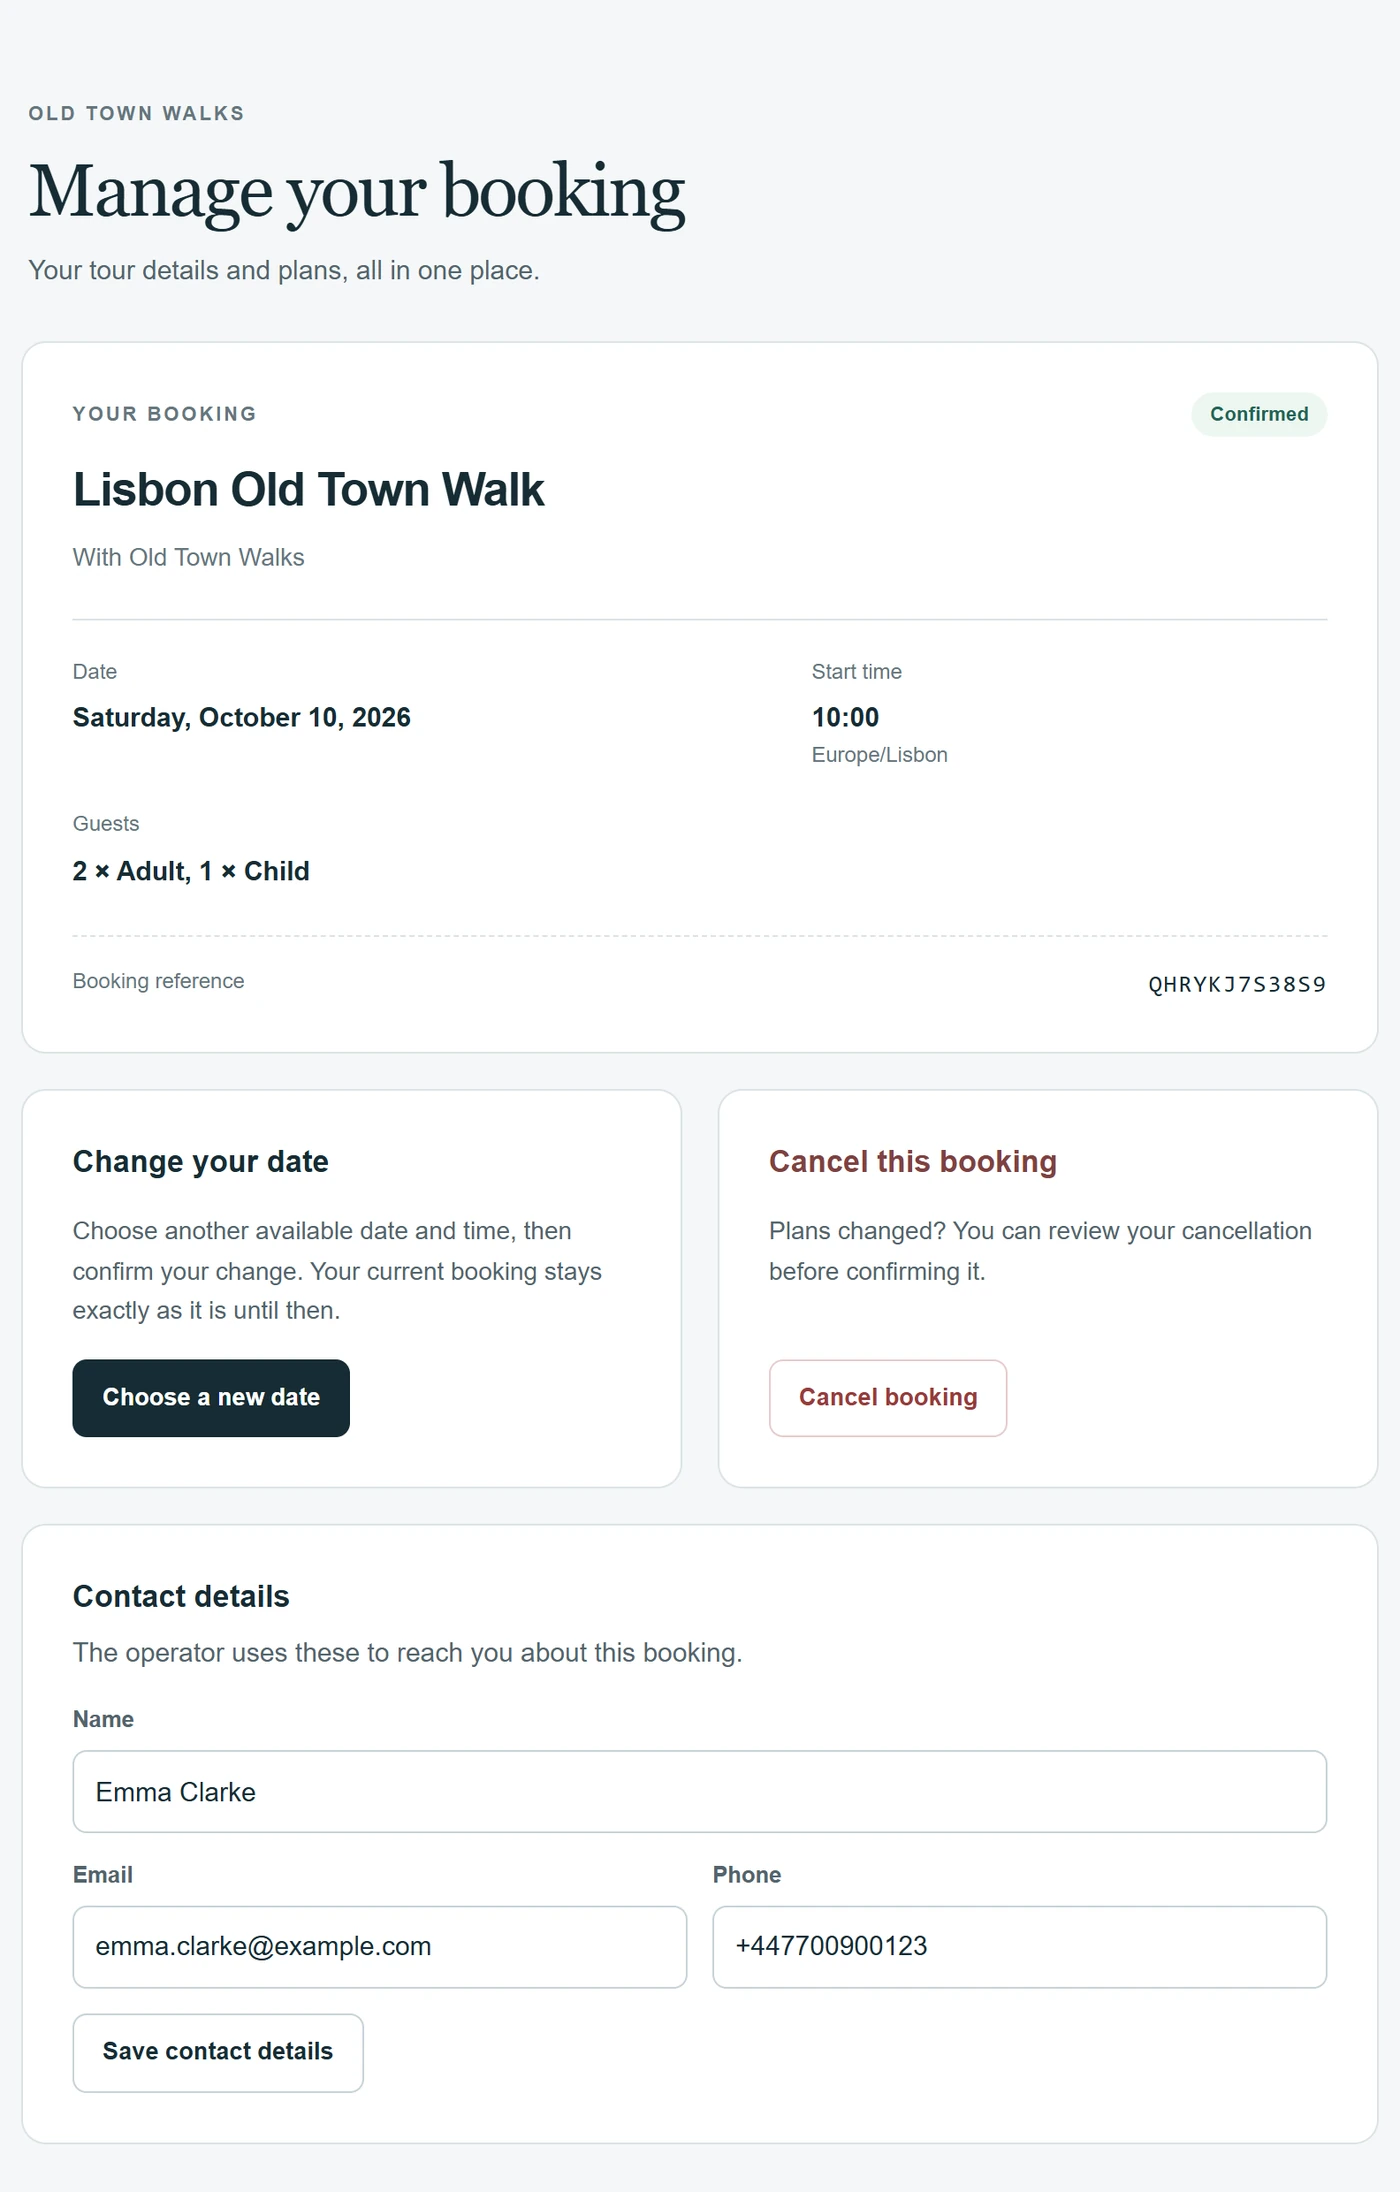
- Open the link in the confirmation email, or View or change booking. On Manage your booking, travelers can change the date, cancel and update their contact details. Use Cancel booking to cancel your test booking.
Setup is complete when your test booking shows in Tours and both emails arrive.
Something missing? See Troubleshooting. Remember to cancel the test booking.
Optional Paid tours
Travelers pay by card when they book. Payments go straight to your own Stripe account: you’re the merchant of record, and TourDash never sees card details.
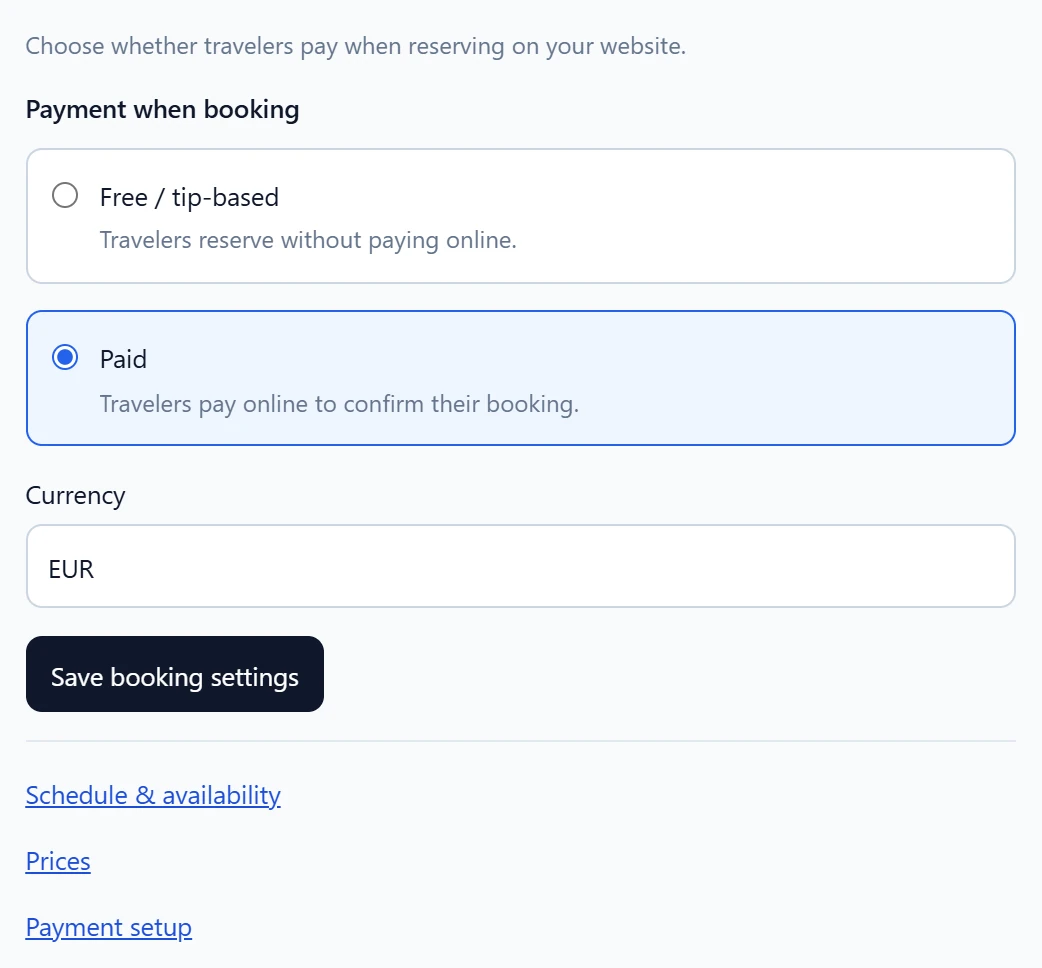
- In Website bookings › Free or paid bookings, choose Paid, check the Currency and click Save booking settings.
- In the tour’s Schedule, open Prices, taxes & promotions. Click Add a rate period, set its First date and Last date to cover every departure, enter a price per ticket category and click Save pricing.
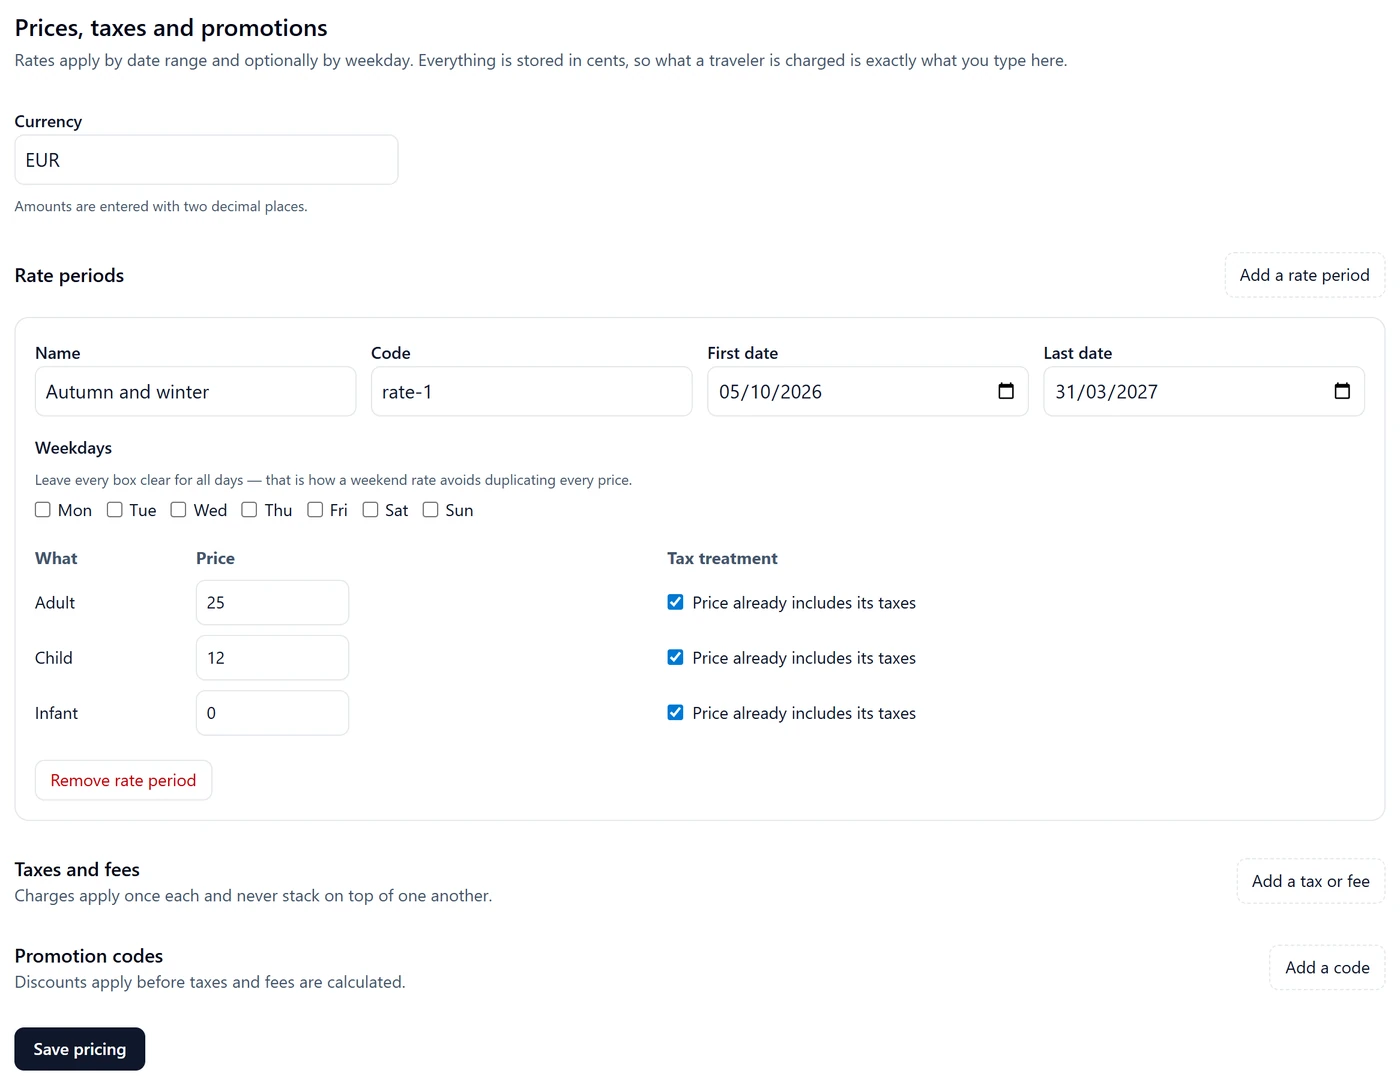
Prices are charged exactly as you type them. Tick Price already includes its taxes when it does. Use weekdays for a weekend rate, and Promotion codes for discounts.
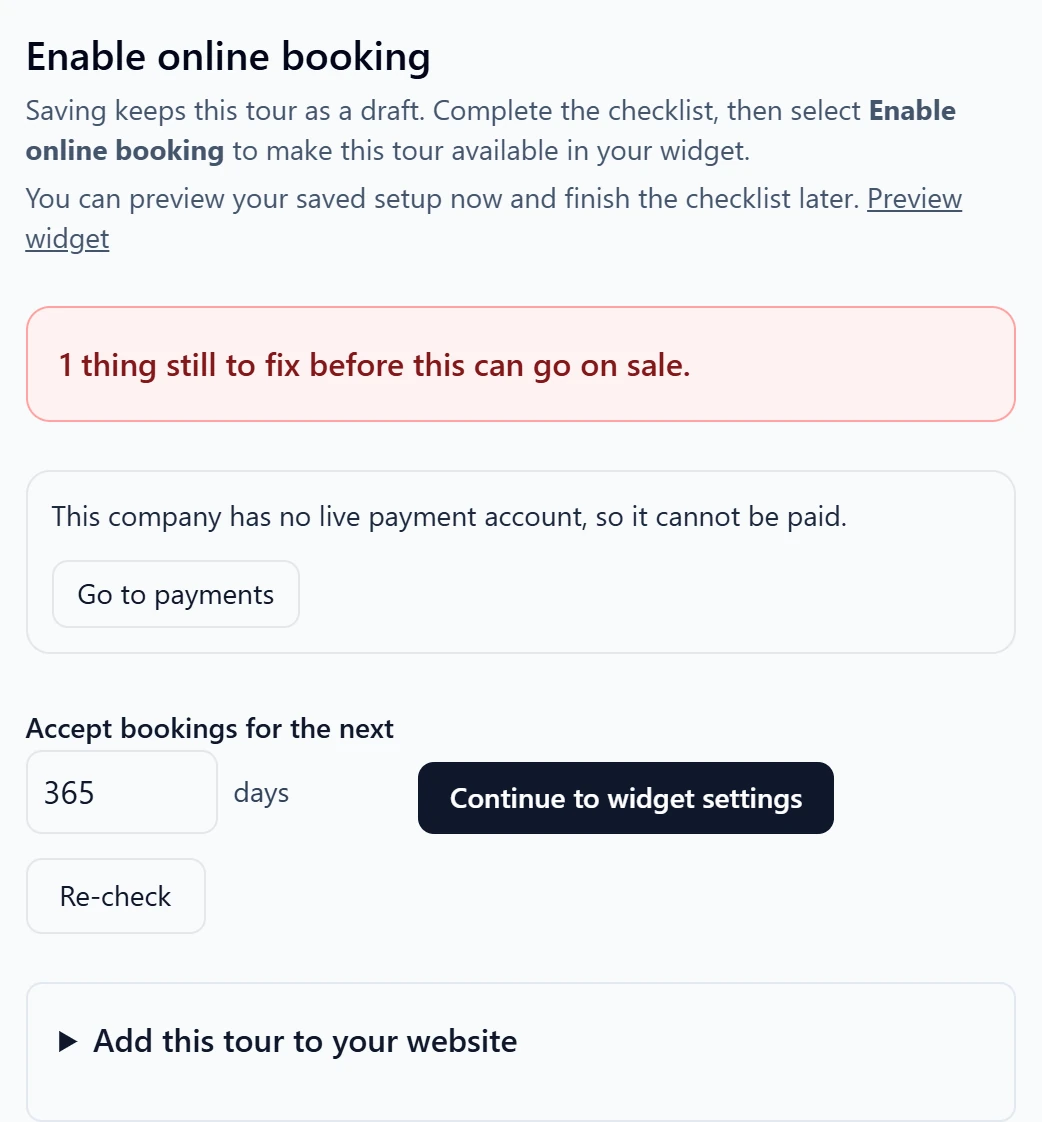
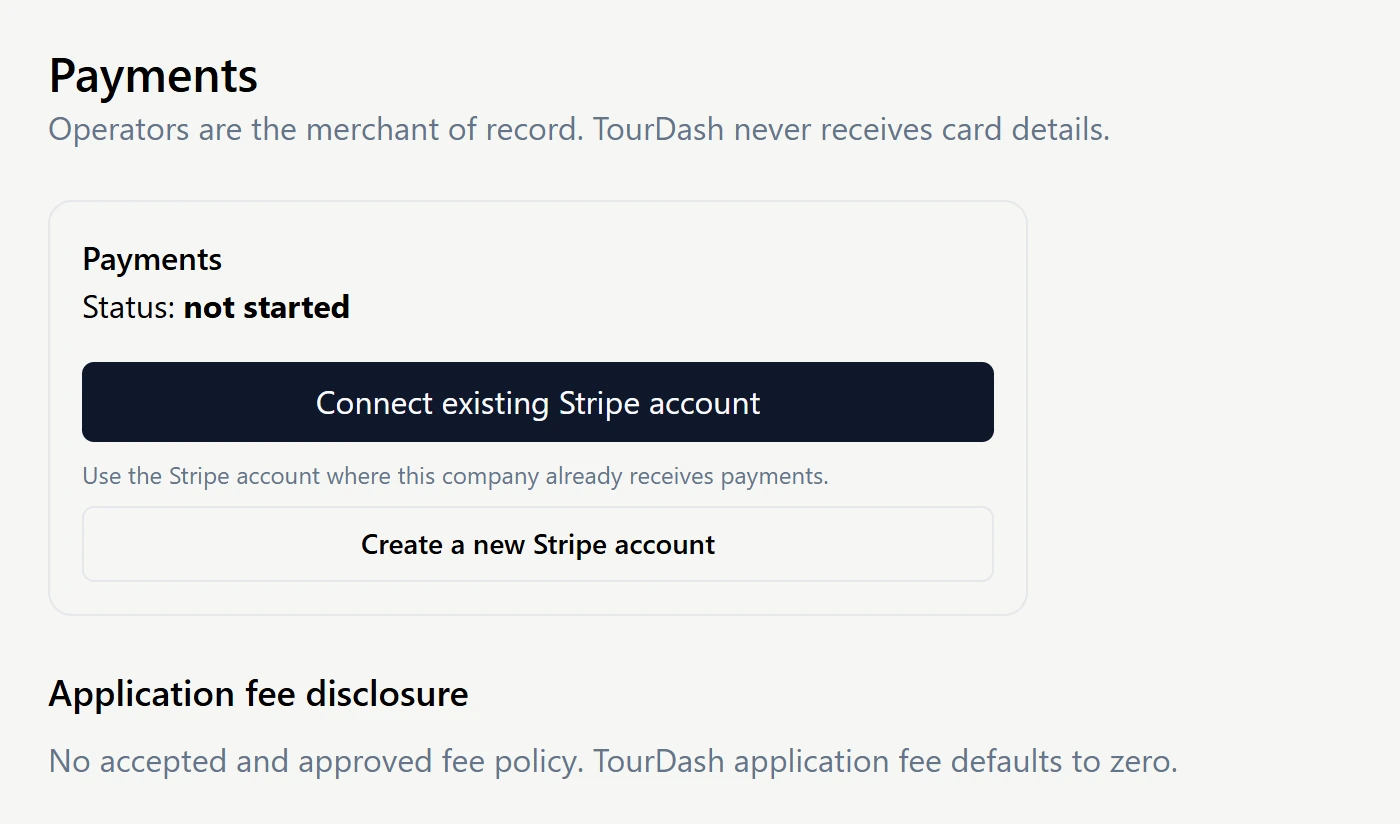
- In the tour’s checklist, click Go to payments. Click Connect existing Stripe account to use the account where you already receive payments, or Create a new Stripe account, and finish Stripe’s setup.
- Wait for TourDash to approve payments. Until then, Widget settings shows
TourDash approval pending.
Free tours keep taking bookings meanwhile.

Result
After approval, checkout opens on its own. Travelers see Continue to secure payment instead of Confirm free booking, and pay in Stripe’s secure checkout inside the widget.
Fees
Stripe’s processing fees come out of your Stripe account, as with any Stripe payment. The TourDash application fee is zero unless you’ve accepted a fee policy that TourDash approved. Check Application fee disclosure on the Payments page.
Troubleshooting
- Enable online booking is greyed out
- No tour is ready yet: Tours ready shows 0. Open the tour’s Manage website bookings and fix what the checklist lists. Only owners can turn bookings on.
- The checklist says the tour has no duration
- Fill in Duration (minutes) in Advanced booking settings, then click Save option and Re-check.
- The checklist asks for a photo or a cover
- In Edit photos, add at least one image and click Make cover on one of them.
- The widget on my website shows only
Open secure booking page
- TourDash hasn’t allowed your website yet. Email support its exact address, with and without www if both open. Your direct booking link works meanwhile.
- A tour or date is missing in the widget
- Check that the tour is enabled, the season covers that date, the time runs on that day, and the date is within Accept bookings for the next. In the code, check that Departure languages includes the tour’s language.
- My changes to the mode or languages don’t show
- These live in the code. Copy the code again and replace it on your website.
- I didn’t get the
New booking received
email - Enter a Booking notification email in Settings › General, and check your spam folder.
- A paid tour can’t be booked
- Check the tour’s checklist for prices that don’t cover every date and for your Stripe
account. If Widget settings shows
TourDash approval pending
, checkout opens once we approve payments. - I changed the listing, but a traveler sees the old terms
- That’s on purpose. Saved changes apply to future bookings; existing bookings keep the terms they were booked under.
Need help?
Tell us which step you’re on and what you see. We’ll allow your website, check your setup and approve payments.