
How to connect Bookings with Gmail
Set up automatic booking forwarding in just a few minutes
1
Add TourDash Address to Gmail
Enter address
- In your "Forwarding settings" click "Add a forwarding address"
- Enter your TourDash address you received from us and continue the steps.
Your Gmail account may not allow forwarding. Check with your manager or the IT team, or contact TourDash support for help.
Click link in mail to allow forwarding
- You just received a confirmation email. (If not, let us know!)
Important: As long as you see "Verify mycompany@bookings.tourdash.app" under the "Add a forwarding address" button, you will not be able to proceed to the next
step.
2
Create a forwarding filter
Create Filter in Gmail (Pre-filled)
Opens Gmail with booking addresses already filled in
Forward booking mails
- Click the filter icon at the top of the screen.
- Paste the following addresses (or use the pre-filled link above):
automated@airbnb.com OR express@airbnb.com OR no-reply@bokun.io OR no-reply@buendiatours.com OR reservas@civitatis.com OR noreply@order.eventbrite.com OR messages@fareharbor.com OR bookings@freetour.com OR noreply@freetour.com OR no-reply@freetour.com OR reservations@freetoursbyfoot.com OR do-not-reply@notification.getyourguide.com OR no-reply@guruwalk.com OR freetours@oneport.app OR bookings@turitop.com OR no-reply@turitop.com OR booking@viabam.com OR appointments@wixbookings.com OR booking@t1.viator.com OR bookings@robotkong.com
- Click "Create Filter"
- Select "Forward to" and choose your address
- Click "Create" and validate
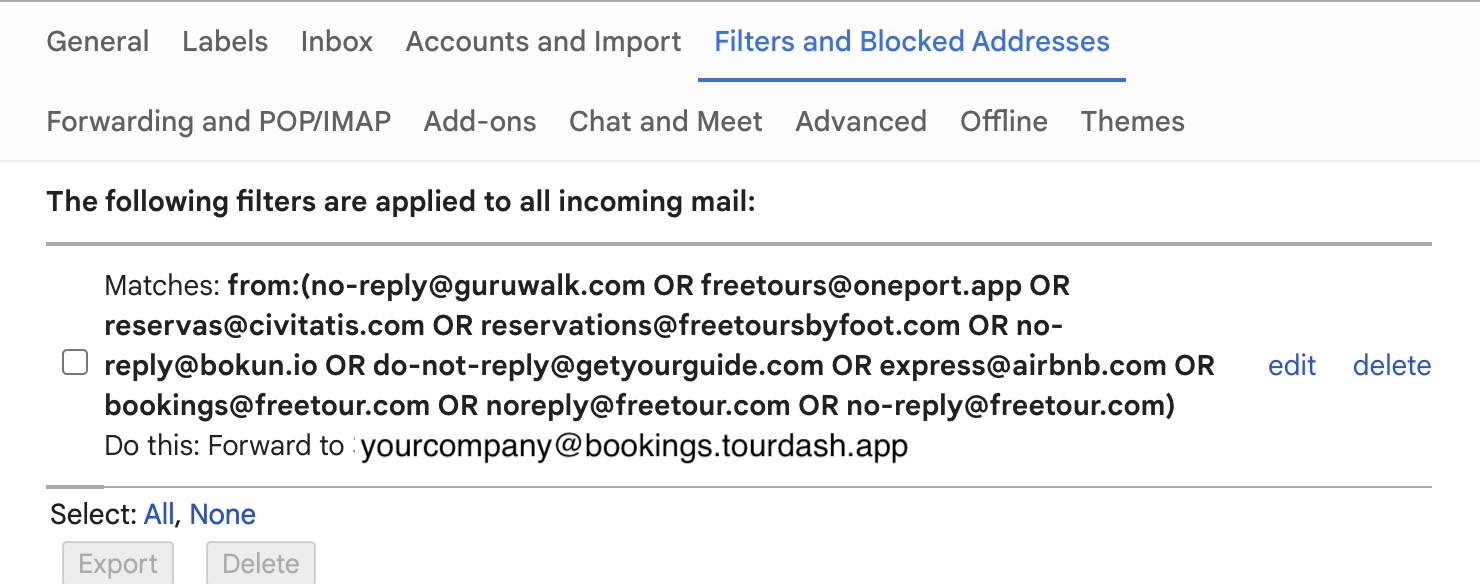
Check if everything's correct
Go to "Filters and Blocked Addresses". If everything is set up correctly, you should see this:
You're all set!
Now you can wait for your bookings to appear in your Dashboard automatically.